Skip to content

Blog

HyperHDR Part 5 - LEDs

If there is one part of this project that scares the hell out of me, it’s the LEDs. This is the part of the project I’ve researched the most about and still feel I know the least about.

The HyperHDR developers recommend the SK6812 5v LEDs over WS2812B, commonly known as Neopixels. The SK6812 LEDs are RGBW and add an extra white channel that Neopixels don;t have.

5v 5 meter reel of SK6812 LEDs

My TV measures 39ā€ tall x 76ā€ or approximately or 99cm x 193cm, so I’m going to need just under 6 meters of LEDs. And of course they come in 5 meter reels.

So not only am I going to need to solder the microcontroller and the power to the LEDs, I now have to solder two LED strips together. I will also need to add a second power run and inject power either at the end or the middle of the LED strip to make sure the LEDs have enough power to stay bright. And let’s just say my soldering skills aren’t that great.

Closeup of 5vSK6812 LEDs

This is where this topic being the most research of anything I’ve done yet. I’ve read articles and learn guides, I’ve watched YouTube videos, I even consulted with Claude. And I still don’t feel like I have all the information I need to start this part.

If I’ve understood everthing correctly:

  1. I’m going to install the 3 prong AC cable into the power supply.
  2. I’m then going to cut the LED strip along the cut line. One YouTube video suggested sacrificing one of the LEDs so you solder together two half-pads, giving you a full pad and more space. (But if I do that, I need to keep track of how many LEDs I’m using in total, as HyperHDR wants to know the total number LEDs used. That includes adding the second strip as well.)
  3. I solder power and ground from the power supply to the LED strips.
  4. I solder the ground and data pads to the Adafruit Scorpio GPIO16 (HyperHDR’s Scorpio firmware comes with GPIO16 as the default) and the ground goes to the power supply and the data cable goes to the data in on the LED
  5. I’m then going to cut the LED strip again and solder ground, data, and power.
  6. Somewhere around the 3 meter mark I’m going to solder only power and ground from the power supply into the LED strip.

I should have bought another Scorpio as backup for when I screw this up.

HyperHDR Part 4 - Space Constraints

One of the goals of the project is not to take my TV off the wall. It's a 75" Sony, and you can see from the photo there is some space to work with:

Space behind the TV and the wall

I need to find a way to mount:

  • HDMI Splitter
  • Ugreen USB Video Capture device
  • Raspberry Pi 5
  • 300w power supply
  • Adafruit rp2040 Scorpio

..all without taking the TV down and hidden behind the TV. The power supply is the one giving me the most anxiety - I'm concerned about heat and I'm not quite sure how to mount it to the wall. There are DIN rails, but I have a feeling that's not what I want. I've found 3D printed clips that screw into the wall / studs, or I'm wondering if command velcro strips will work. I'm also worried about getting the placement just right since I need two electrical runs to the SK6812 LEDs.

I am planning on using the command velcro strips on everything else, including the Pi, the Ugreen, etc. I've printed a 3D case for the Scorpio, but I need to take another look at how it's wired and if it will work in that case.

Lastly, I need to mount a power strip behind the TV. If you look really close you can see there is apower outlet behind the TV next to a conduit run. Right now the TV and the plain white LED strip are plugged in. I'll have to figure out a way to wriggle my hands behind it to swap out what's plugged in. (More than likely it will be my wife's hands.)

Close-up of the space behind the TV and the wall

Next up: LEDs

HyperHDR Part 3 - The HDMI Splitter

One of the keys to the HyperHDR setup is the splitting the video source, usually HDMI, so it goes to both the display and to the USB video capture device which is plugged into a Raspberry Pi. The Raspberry Pi analyzes the colors and it runs HyperHDR to match those colors on the screen to the LEDs.

If you still haven't watched this 30 second video, it's a great example, especially with the flashlight:

The key to splitting the HDMI signal is the abilty to bypass HDCP, high definition copy protection. Most game consoles come with HDCP off for streaming, but devices like a 4K Blu-Ray Players and the AppleTV require it.

HBAVLink HB-S102B 2x1 HDMI Splitter

Luckily, they make HDMI splitters with HDCP bypass, but the trick is finding one that works with your system. The first one I ordered, the HBAVLink HB-S102B looked like it would work, and it split the HDMI signal successfully, but there was no HDR output when playing a 4K Blu-Ray. HDR is high dynamic range, and it's more important than the amount of pixels (4k) - it's what makes the colors pop, and the lights bright, and the color black a deep black. Luckily, I noticed that the colors looked washed out and, sure enough, there was no HDR.

CORSAHD 2x1 HDMI Splitter

That led to me swapping out HDMI cables, eventually buying 2 new 3' cables just to make sure I had compatible ones. I emailed the company and while I waited to hear back from them, I bought the CORSAHD 4K@60Hz HDMI Splitter 1x2. That worked like a champ - HDR came right through.

HBAVLink HB-S102H 2x1 HDMI Splitter

But then I heard back from HBAVLink right away and they shipped me an upgraded model - and shipped it overnight! Now that's customer service, kudos to them for the quick responses via email and fast shipping. Plugged that one in and I'm good to go. If you look at the Amazon page, you'll notice it doesn't explicitly say HDCP bypass, but it worked right away.

Next up: Space requirements

HyperHDR Part 2 - Bill of Materials

Have you ever looked at a project in the Adafruit Learn Guide system and thought, "That's way too expensive for a project, but it looks cool". This is one of those projects. Though 2 items make up almost a third of the cost, it does add up. And I'm not including the Raspberry Pi 5 I just happened to have laying around not doing anything. But I was lucky and got an unexpected bonus at work, so here we go.

I've spent the better part of the week researching all of these parts. When I decide to do a project like this, I go down the rabbit hole and try to learn as much as I can. I'll have more on that when it comes time to talk about the LEDs.

The total cost, excluding the Raspberry Pi, comes in at around $350. (Gulp). The USB capture card ($100) and 2 strips of LEDs ($88) make up the bulk of the cost.

Item Price Notes
Pi5 power supply $15 I've had a Pi 5 for a couple years, but just powered it off USB-C. Need to fix that.
USB capture card - UGREEN 4K@60Hz Video Capture Card $100 Recommended by the HyperHDR team, this makes up almost a third of the cost
LEDs - 60 LED 5v - BTF-LIGHTING RGB+Cool White SK6812 $88 (2 Ɨ $44) Of course I need roughly 6 meters and they come in 5 meter strips, so I'll need two. Again, almost a third of the total project cost. The RGBWs are recommended for the extra white channel, so choosing the Sk6812s over WS2812 Neopixels.
300w BTF-Lighting Power supply $33 Beefy, should be more than enough. I'm worried about heat, but I'll mount it on the DIN rails below.
Pinfox 6ft 16 Gauge 3 Prong Power Supply Cord Cable $11
Adhesive Cable Clips - 60 PCS XHF 5/8" Clear Clips $7 Going to go with these instead of sticking the LEDs right onto the back of the TV.
3' HDMI cables $18 (2 Ɨ $9) Already bought, had to test the HDMI splitter.
Power supply mount / DIN rails $10
2 USB-C to USB-A cables - Hrbzo USB-C Cable 3-Pack $7 Can't believe I don't have a couple of these laying around.
CORSAHD 4K@60Hz HDMI Splitter 1x2 $30 More on this in the next blog post.
Adafruit rp2040 Scorpio $15 Again, recommended by the HyperHDR team.

Next: The HDMI splitter

HyperHDR Part 1 - An Introduction

I was recently reminded of HyperHDR when they popped up in my GitHub feed after releasing version 22 last week. I had starred the project late last year when Liz Clark of Adafruit wrote up a Learn Guide for installing HyperHDR using a Raspberry Pi 5 and a Trinkey.

HyperHDR is an ambient lighting system you install behind your TV and it uses a video capture device to match the LED colors to the colors playing on your television.

Check out this 30 second video which does a great job of showing HyperHDR in action:

To contrast that, today I just have some white LEDs behind my television, this is what it looks like with the lights off:

Trinity and Neo from the Matrix

I only have LEDs on the sides and the top, nothing along the bottom, which is something I’m looking to fix.

Over the next weeks I’ll be blogging my progress in installing HyperHDR behind my television.

Next up: Bill of Materials

100 episodes!

With the release of today's episodes of The CircuitPython Show and The Bootloader, it marks my 100th episode between the two shows. If you ever look into starting a podcast, most of the articles out there mention that the average podcaster doesn't make it past episode 7, and here we are four and a half years later.

I've had the opportunity to interview a lot of great people, I've made some friends, and made a good friend in my co-host Tod Kurt. I'm grateful to everyone who has been a guest on an episode, listened to the show, or shared it with a friend.

Here's to many more episodes!

ListenBrainz All the Things

In the last two episodes of The Bootloader, I've covered Parachord, the cross-platform music player, and Achordion, it's accompanying music commuity. Achordion is built on top of ListenBrainz, which, per its website, keeps track of the music you listen to and provides insights into your listening habits. Looking at various ListenBrainz tools, I ended up creating (or re-creating) my own, with some help from Claude.

ListenBrainz Widget

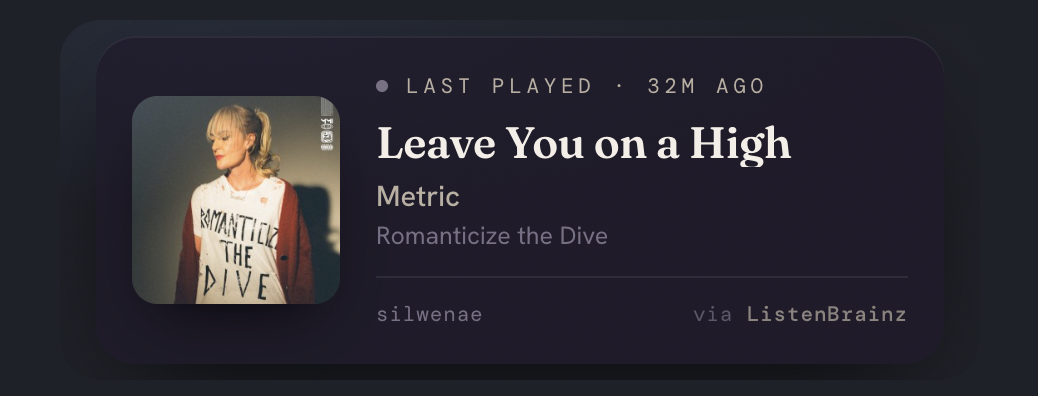
For the last few years, I've maintained a Now Spinning page, which I update monthly with the records that are on the turntable. ListenBrainz offers a widget you can embed in a web page, but I wanted something a little more stylish to add to my Now Spinning page. That led me to create listenbrainz-widget. It includes two widgets, the first being a "Now Playing" widget that I've embedded on my Now Spinning page that looks like this:

Now Playing widget featuring Metric

Using GitHub Pages, you host the HTML there and then you can embed it on any web page.

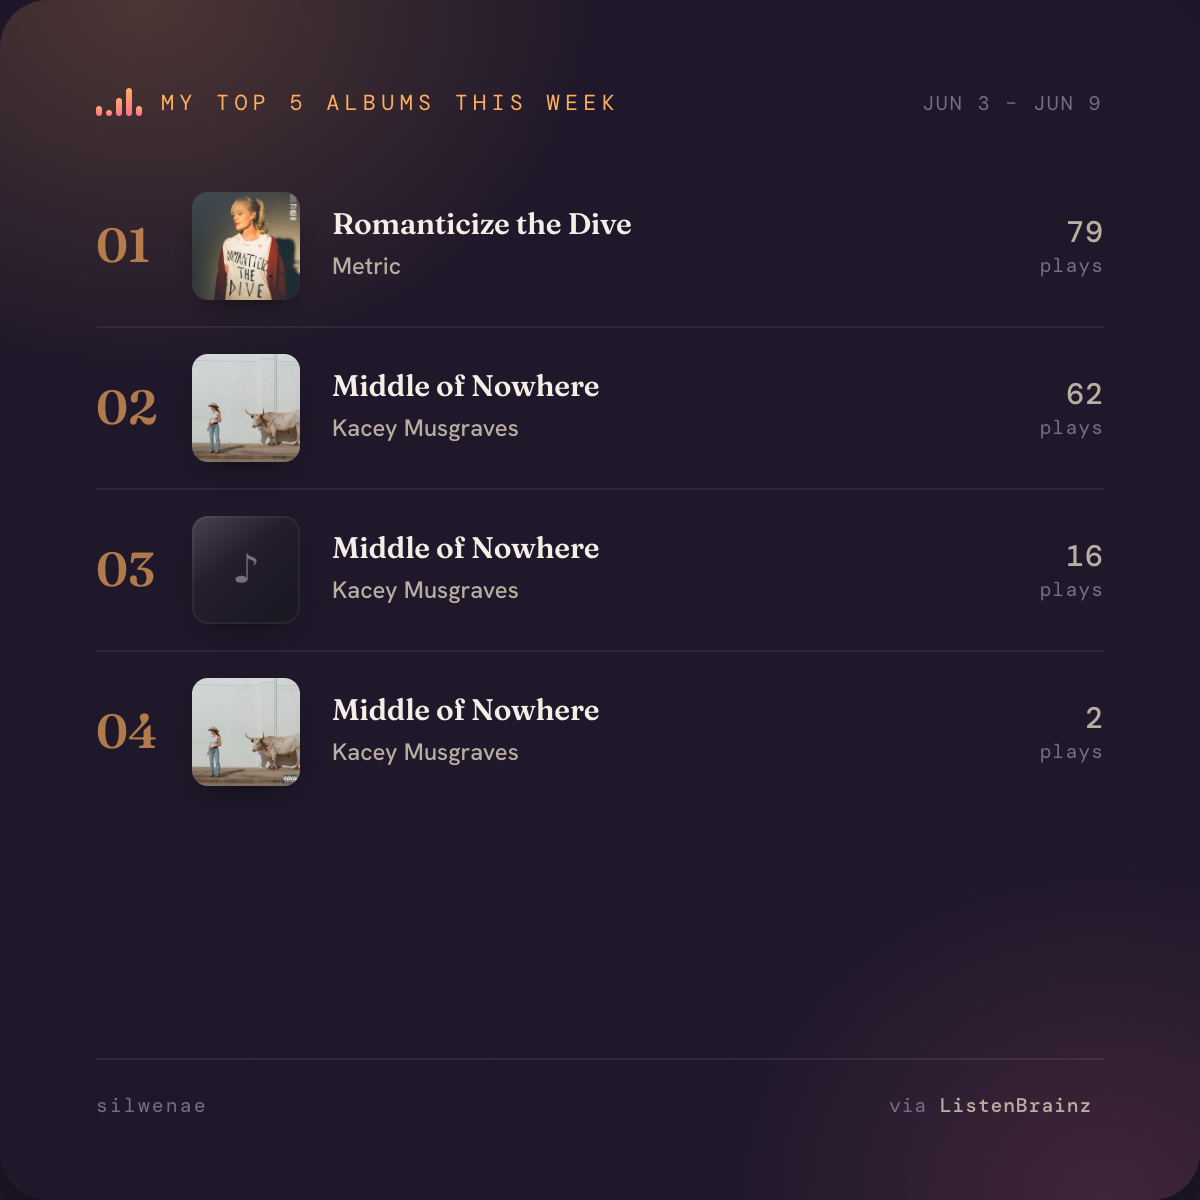
The second widget is a "Top 5 Albums" image generator that you can then share on social media. It creates a 1200x1200 PNG of the top five albums you listened to based on the data range you choose.

I even created a cool landing page for the widgets. The README in the repository has all the details on how to install and run it.

Top 5 albums of the week

listenbrainz-autoposter

Inspired by the scrobble-blue project, listenbrainz-autoposter posts your top 5 album listens from the previous week to Bluesky and / or Mastodon. This uses GitHub Actions to automate the widget above instead of Cloudflare, like the original project.

I have it set to share my top every Tuesday, giving ListenBrainz enough time to process the previous week.

listenbrainz-to-bluesky

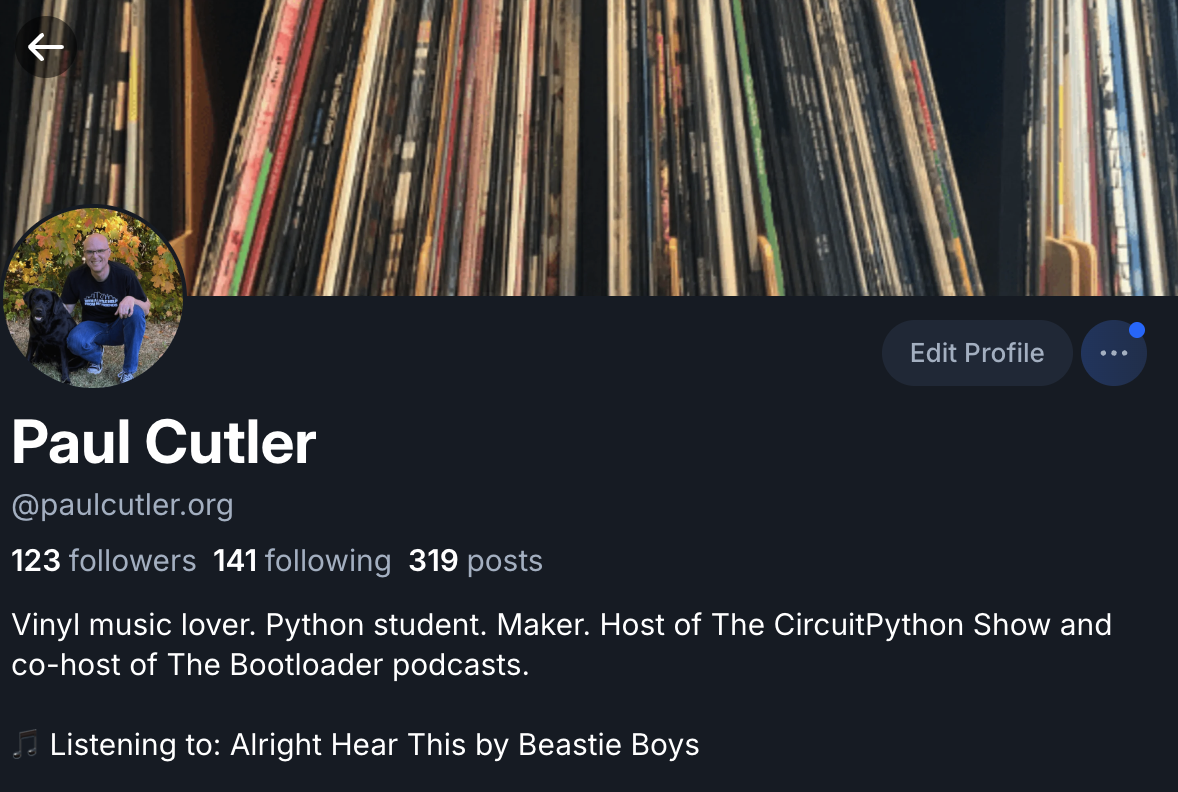
Another project inspired by someone else, this time it is again scrobble-blue by Will Manduffy. listenbrainz-to-bluesky adds one line to your Bluesky profile with a "Listening to" and the name of the song and the artist of your most recent scrobble. This one is self-hosted and runs via a cron job every few minutes.

Paul's Bluesky Profile showing Listening to: Alright Hear This by Beastie Boys

Too much oversharing? Probably, but I know a few folks have liked some of the music recommendations, so I'm going to share for now.

Moviebuff

Moviebuff is a Django application originally written by retiolus that was released last August. I’m not sure how I originally came across it, but I remember it being demonstrated on Mastodon. Moviebuff allows you to track and rate the movies you watch and share them on the Fediverse.

I already have a music site and I’ve been tracking what I watch manually, so I was kind of excited for Moviebuff. I forked it right away, but there wasn’t any installation instructions and I’ve never used Django. I was able to reverse the first few things needed in the .env file, such as the Django secret key, an API key from The Movie Database, but I couldn’t figure out how to get Federation working. The code to add Federation didn’t appear to be in the original repository or any of its branches.

So there it sat. I debated a few times about opening an issue in the Moviebuff repository asking for help, but I didn’t want to bug the maintainer and I was just grateful that anything had been shared and open sourced.

After successfully using Claude Code to help create the circuitpython-bambulabs library, I pointed Claude at Moviebuff and away it went. It surprised me again when it was able to add Federation to the project based on the scaffolding that was already there, no database changes needed.

I’ve done a few projects in Pyramid and FastAPI, so Python based web frameworks weren’t totally new to me. Partnered with Claude, I went to work.

Things I’ve updated and changed:

  • Added dark mode and made it the default with a toggle to change light or dark mode on the home page
  • Added working Federation based on the buiding blocks present in the app
  • Changed Federation to only post when a movie is rated. Also added a Share to Fediverse button using HTMX that appears when a movie is added to the Watched Movies list
  • Added an environment variable and code to enable or disable registration (to avoid spammers)
  • Disabled the registration pages if the user is unauthenticated and registration is disabled
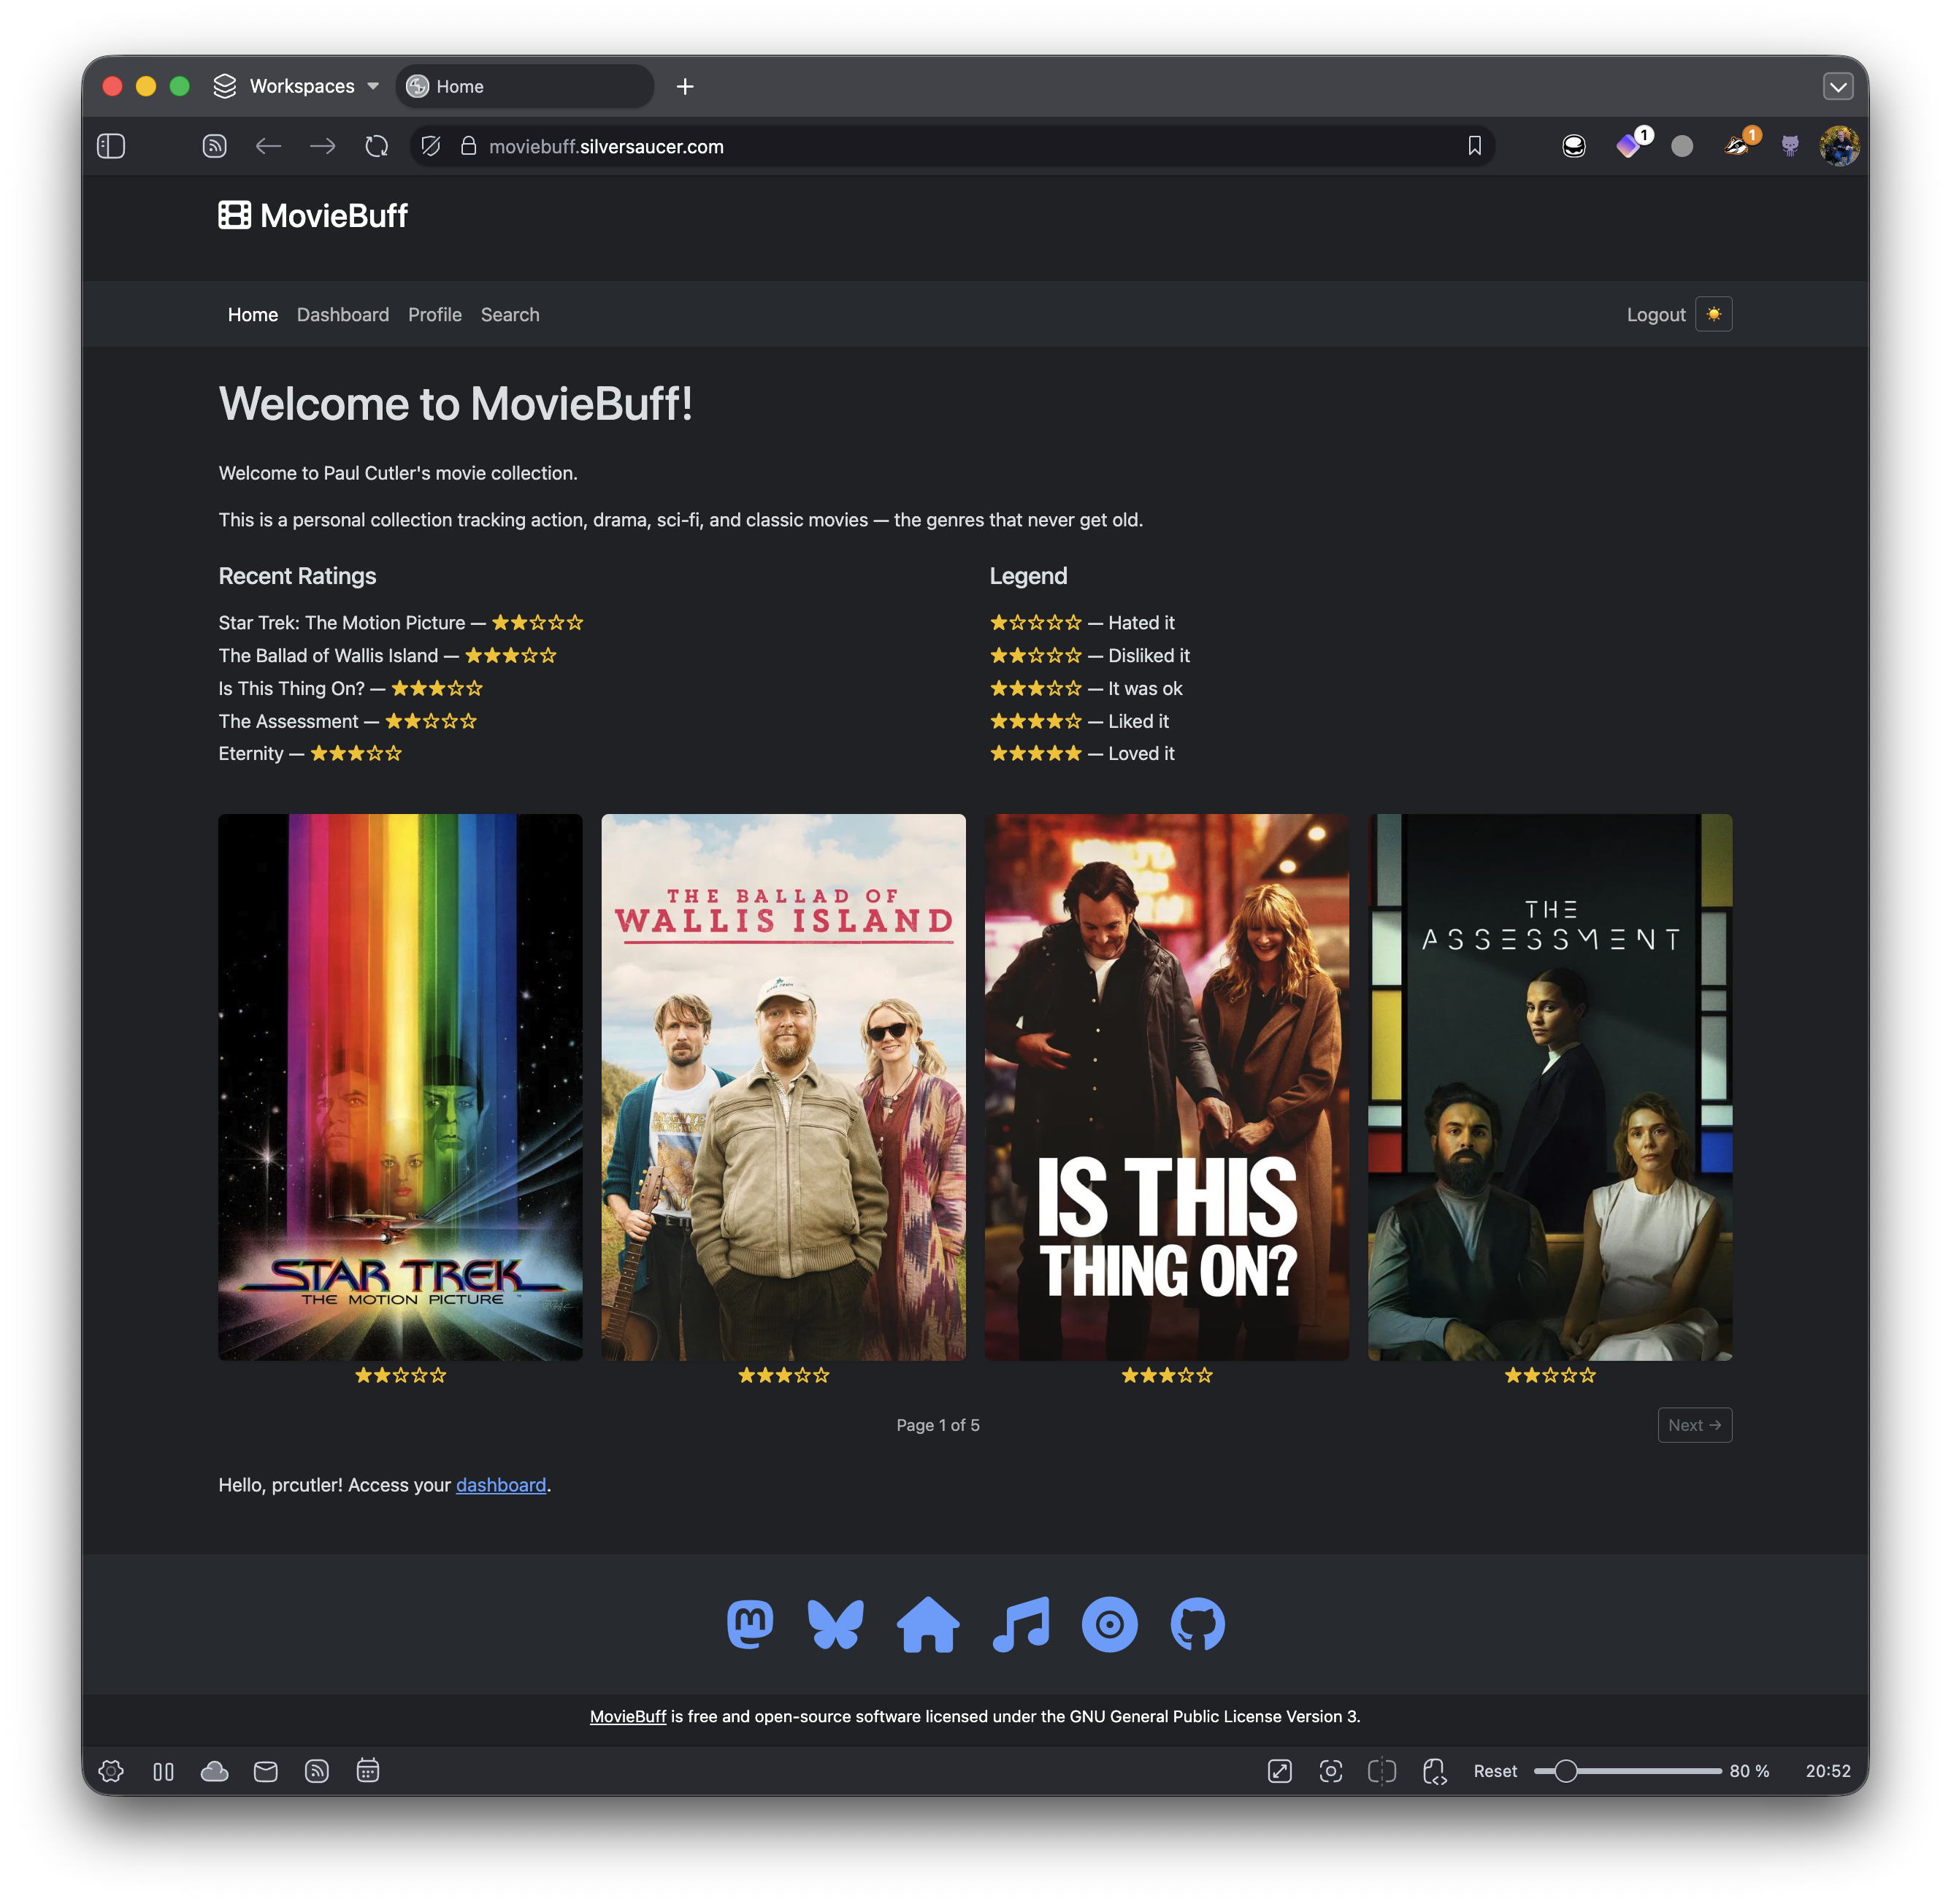
  • Updated the home page to show a legend, the five most recent movies rated, movie posters for the four most recent movies rated, and HTMX to page through the rated movies
  • In the Dashboard, added HTMX to page through all the Watched Movies
  • In each movie card, added the star ratings for the movie
  • Updated the datetime fields to be MON/DAY/YEAR and added commas to the movie's budget
  • Added a Font Awesome film icon in the upper left and made it and Moviebuff clickable to return to the home page
  • Added a custom footer that matches silversaucer.com
  • Added a CONTRIBUTING.md and CODE_OF_CONDUCT.md
  • Added installation instructions in the README

You can see it in action at https://moviebuff.silversaucer.com. I’ve added most of the movies I watched in Feburary and March and I’m still debating about adding earlier movies.

The code lives at Codeberg and I’ve made a synchronized mirror on GitHub. If you like it, give it a star! And if you really want to know what I’ve watched, you can follow me on Mastodon at @prcutler@moviebuff.silversaucer.com.

I’m so grateful to retiolus for creating the app and releasing it under an open source license. I’m looking forward to rating, cataloging, and sharing the movies I watch.

Moviebuff homepage screenshot

What I'm Watching - Q1 2026

It's a new year and I'm still tracking what I'm watching. I have a number of television shows still in progress. I don't write them down until the season I'm watching has finished.

Highlights include finally getting around to For All Mankind season 4 with season five having just started. I highly recommend this show if you haven't seen it. I also enjoyed Predator: Badlands, Have Fun, Don't Die, Good Luck, and The Rip. Whatever you do, don't watch Mercy. I still need to catch up on some of the Oscar nominees.

Legend

  • The Criterion Channel = *

  • 4K UHD = +

  • AppleTV+ = ^

  • Netflix = ~

January

  • Predator: Badlands (2025)
  • Boogie Nights+ (1997)
  • The Rip~ (2026)
  • Dust Bunny (2025)
  • Landman S2
  • What Lies Beneath~ (2000)
  • For All Mankind S4^
  • If I Had Legs, I’d Kick You (2025)

February

  • Loot S3^
  • The Wrecking Crew (2026)
  • The Ballad of Wallis Island (2025)
  • The Assessment (2025)
  • The Lazarus Project S2
  • Is This Thing On? (2026)
  • Mercy (2026)
  • The Housemaid (2025)
  • Eternity (2026)^
  • Industry S1
  • Honey Don’t (2025)~

March

  • Crazy Stupid Love (2011)~
  • Mission: Impossible 2 (2001)+
  • Dracula (2027)
  • A Man on the Inside S2~
  • Good Luck, Have Fun, Don’t Die (2027)
  • Pacific Rim (2013)+
  • Firefly (2001)
  • Serenity (2005)+
  • Send Help (2026)
  • How to Make a Killing (2026)

circuitpython-bambulabs Published!

Following up on my blog post from yesterday, I spent Sunday preparing the circuitpython-bambulabs library to be published.

Unfortunately, I ran into an issue with the CI where it was failing to build. Thanks to some pointers from todbot, I was able to refactor the library and move the MQTT setup into the BambuPrinter class. This makes me happy as the user doesn't have to set up MQTT, assuming they've entered their printer settings in settings.toml, the library handles connecting for you.

I also heard from Brent Rubell at Adafruit who confirmed that the MQTT library for CircuitPython uses MQTT 3.1.1 - which is odd, because while MQTTX would connect locally using 3.1.1 (and not 5.0), CircuitPython would not connect locally. I'll investigate this more as I'm guessing some people would rather connect locally instead of through Bambu Cloud.

Other things I learned:

  • The Creating and sharing a CircuitPython library Learn Guide needs some updates. The process to create docs on ReadtheDocs has changed, libraries use ruff now for linting instead of Pylint and black, and sharing in the Library bundle needs some updates.
  • The Learn Guide doesn't cover publishing to PyPi, though the cookiecutter template does include the GitHub Actions to publish the library. It took me longer than it probably shoudl to figure out how to enter the secrets in GitHub to allow it to build and upload. This would be helpful to add to the Learn Guide.
  • The section in the Learn Guide on Sharing in a Bundle also needs an update. The section on verifying didn't work for me, though Updating the Library list did.

Lastly, a big thank you to Foamyguy who merged my pull request to add the library to the Community Libraries right away! You can find more about the library by:

  • Install via circup: circup install bambulabs to install on your microcontroller. (Just tested it and it's so cool to see that work!)
  • PyPi
  • ReadtheDocs
  • GitHub repository (And if you like it, give it a ā­ļø)