Skip to content

Blog

Practice Cuts

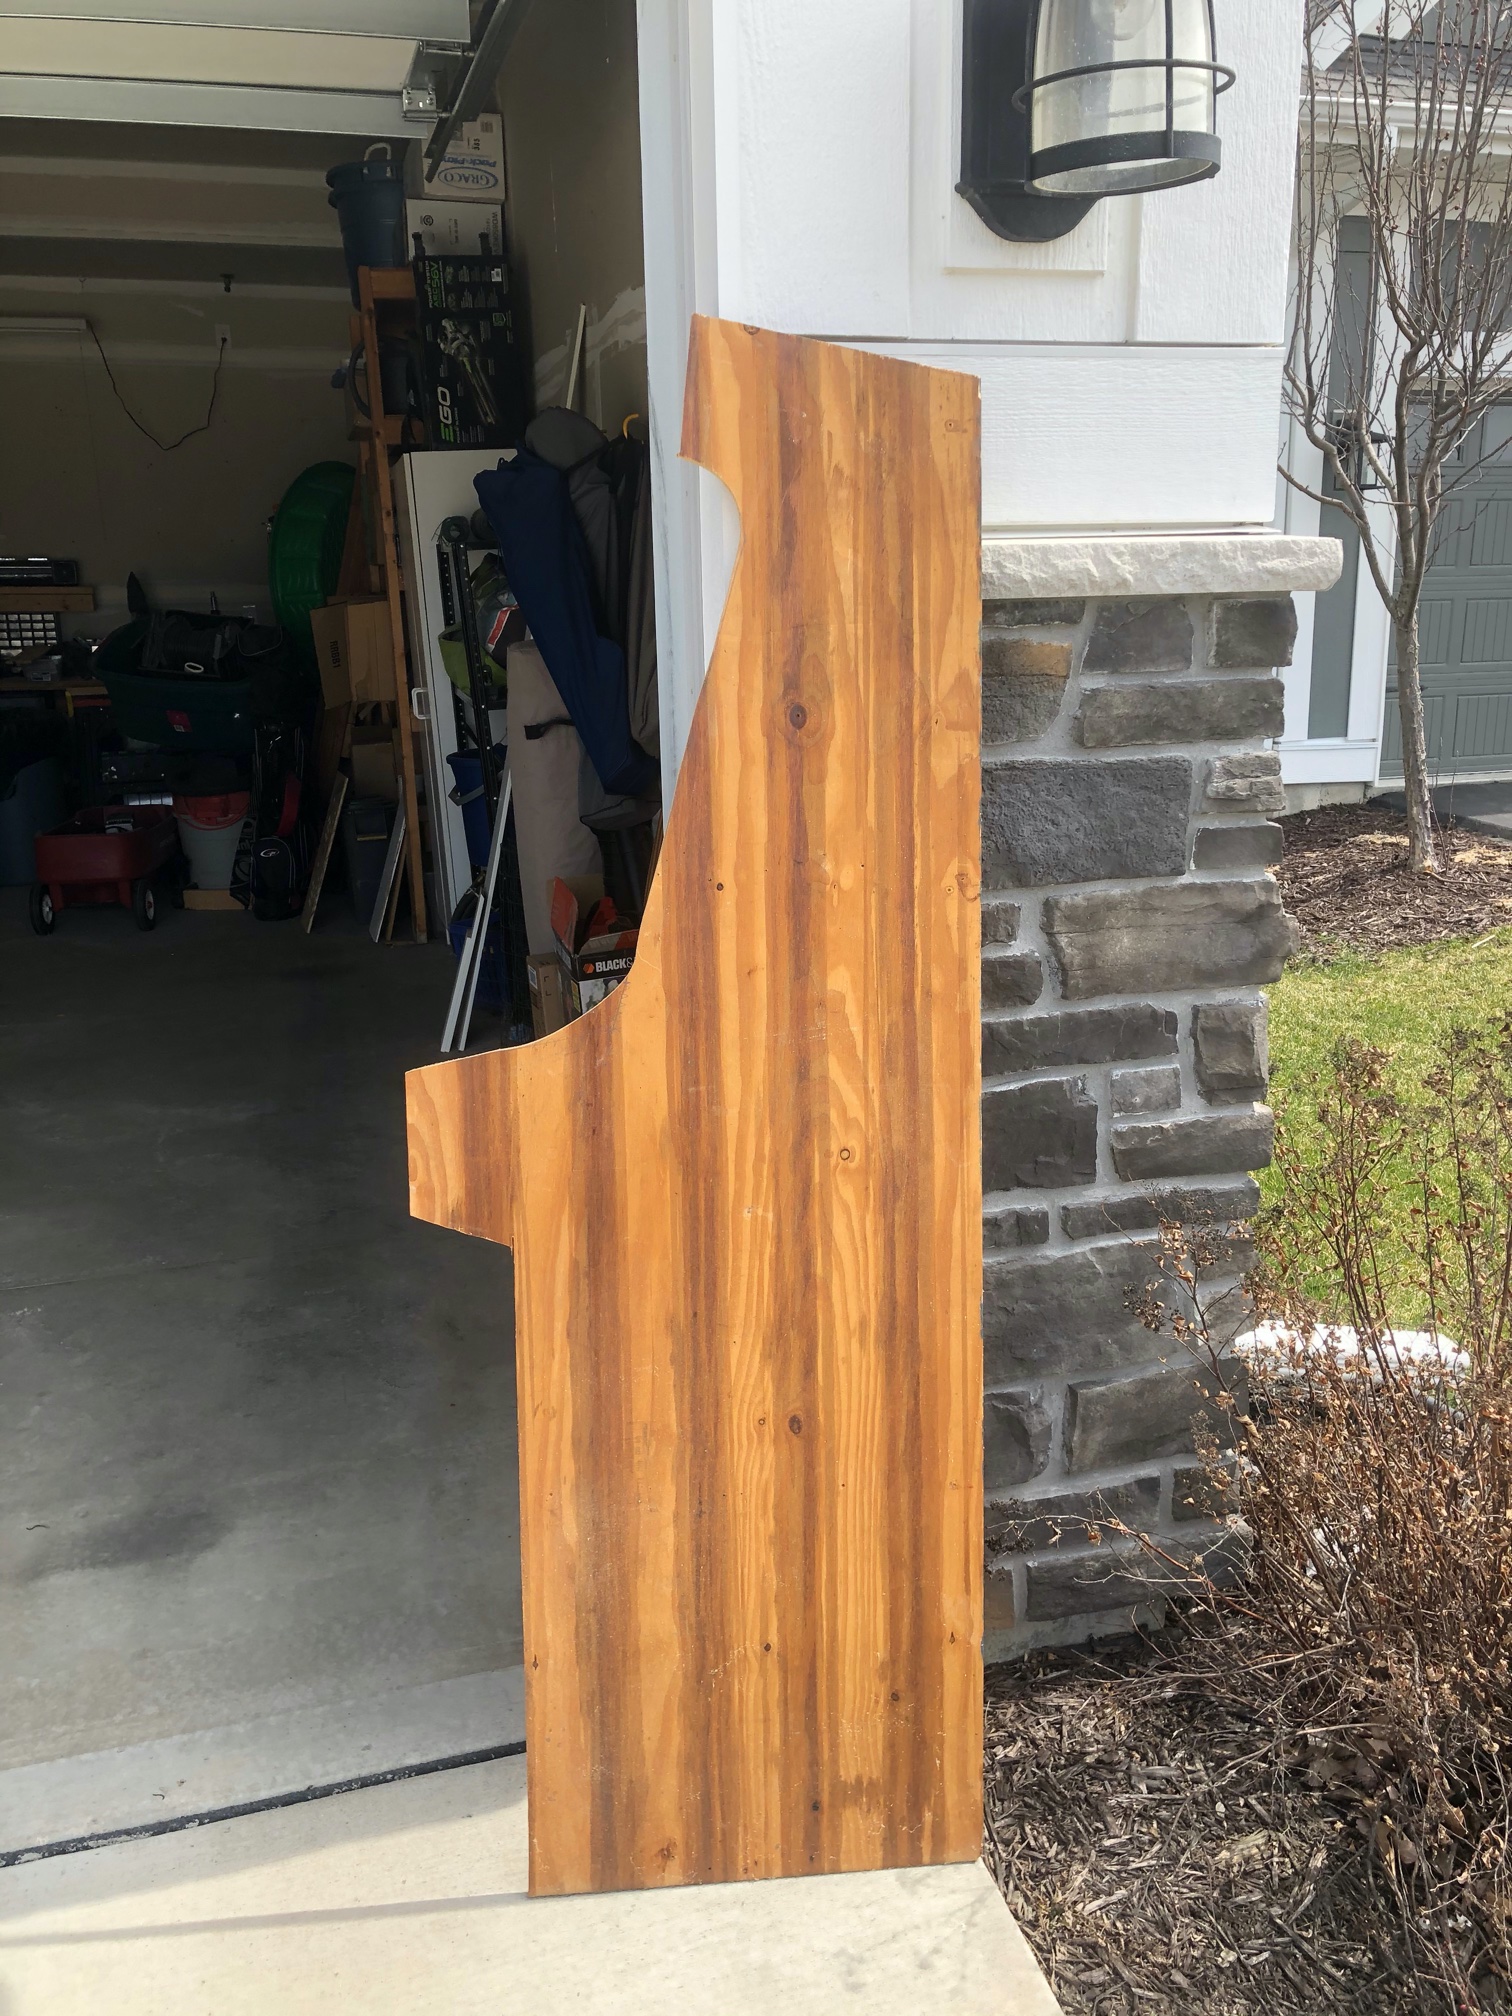
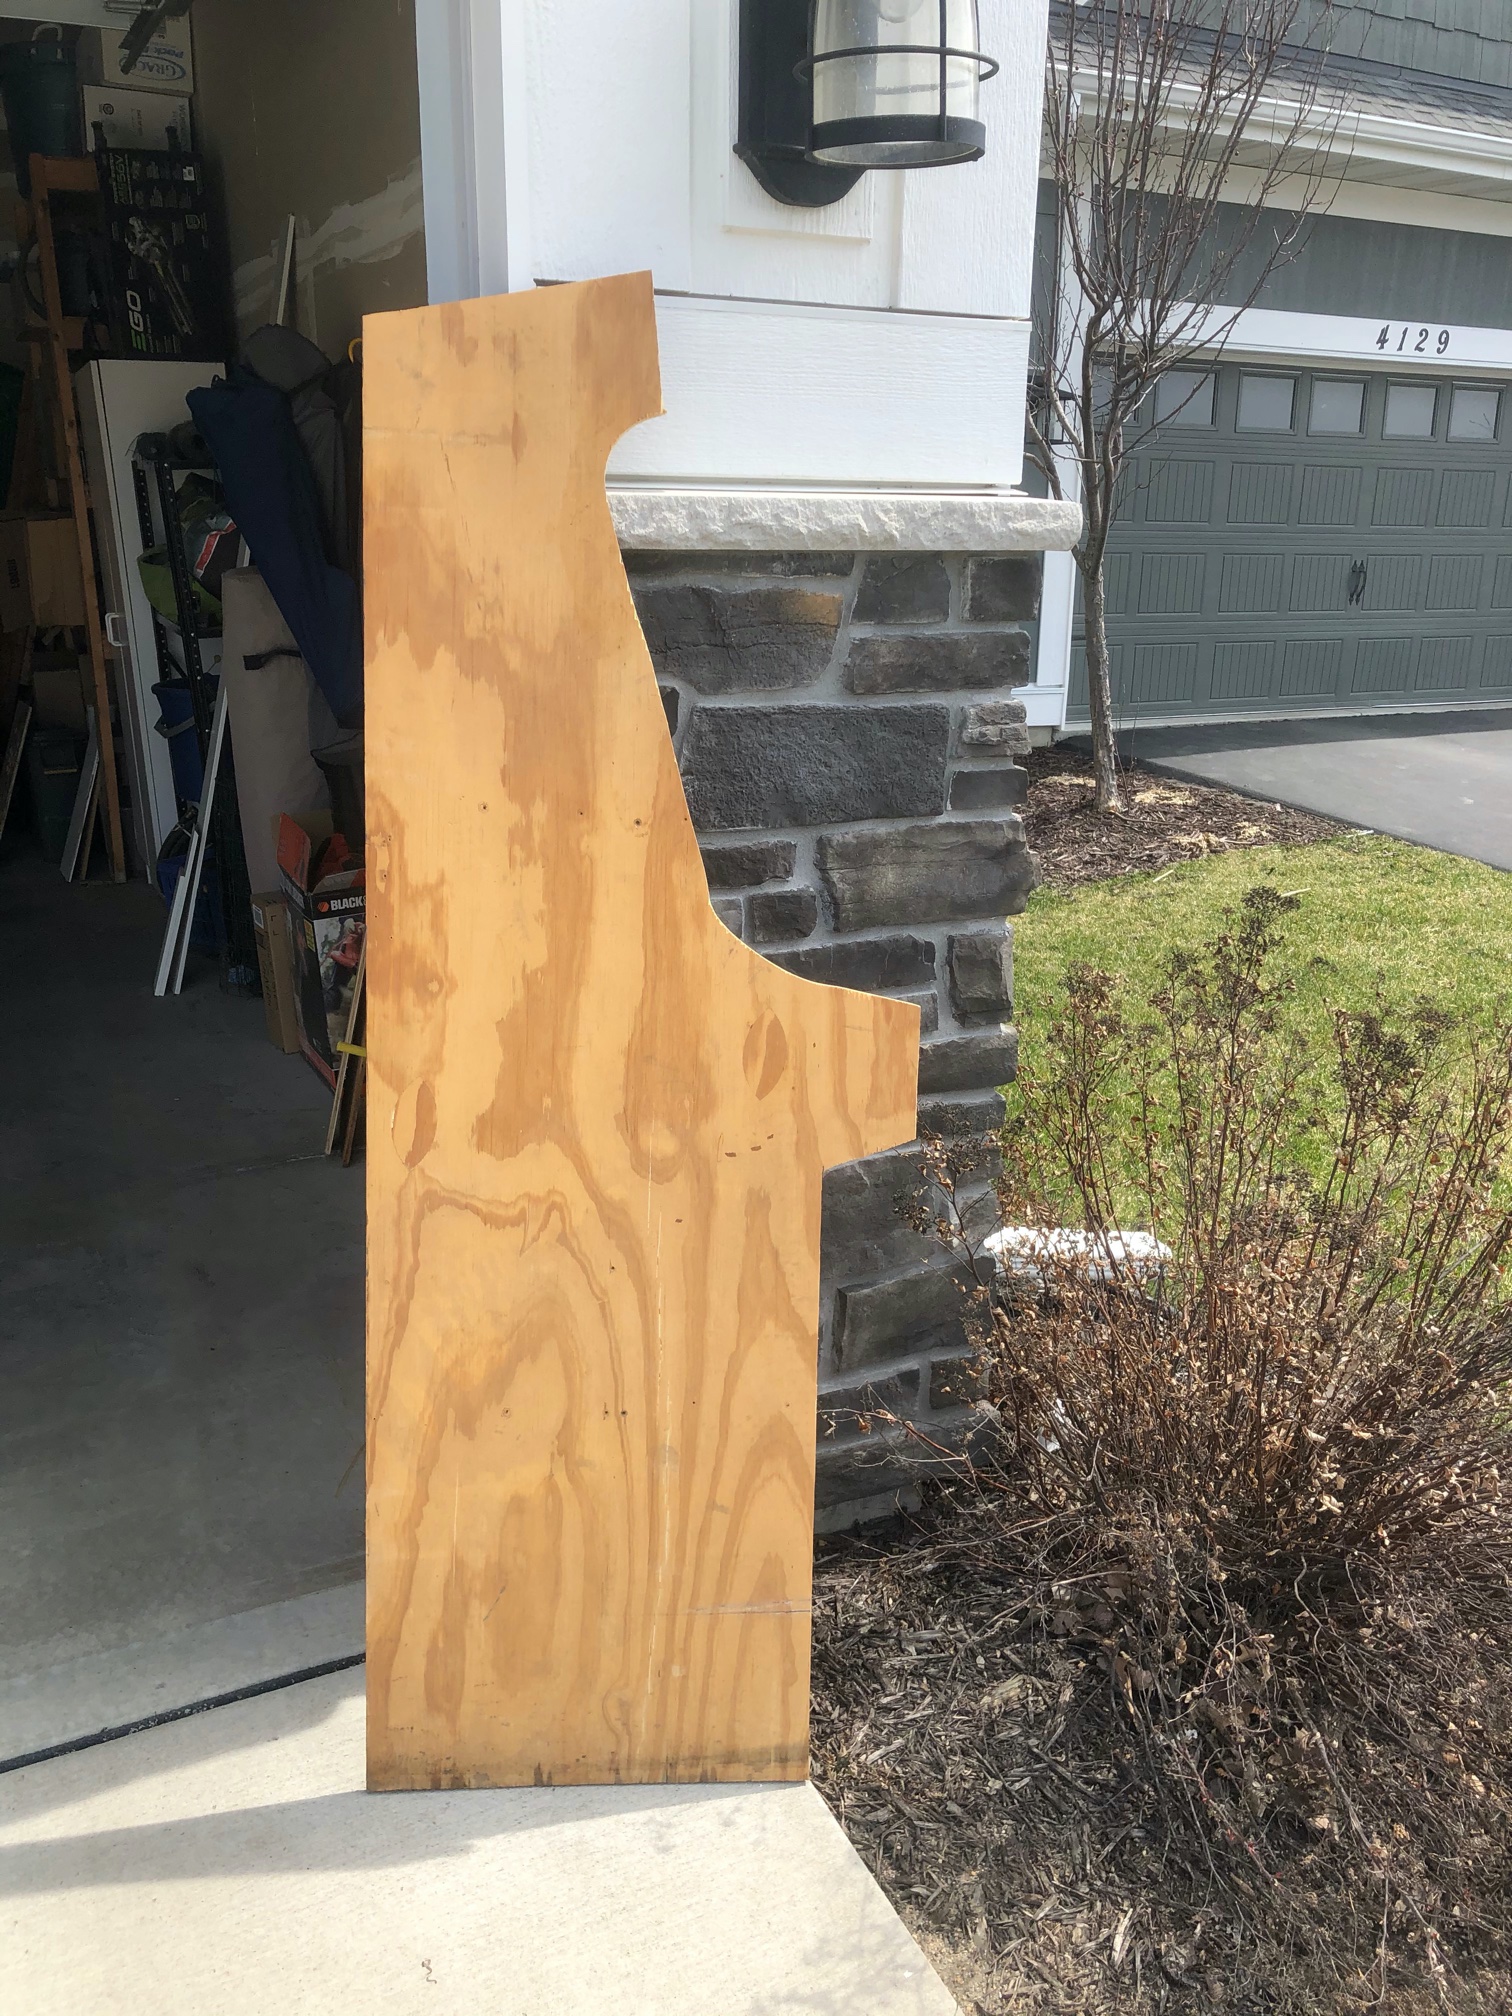
A few days ago I asked Kelly for help in drawing the arcade on the plywood. I had tried to draw the lines for the top of the cabinet, but I just couldn’t visualize it. (It’s both an ongoing joke and the truth that her spacial relationships are a hundred times better than mine. You don’t want to see me try to even pack a suitcase, I’m terrible). I also needed help with how to draw the curves along the sides. Luckily, she made some time Saturday morning and by afternoon I had the saws out.

Practice Cuts

We have two old pieces of plywood that we’ve used for desks at LAN / gaming parties over the last twenty years, with the last time a few years ago here at the new house. This is what I used for my first practice round with the saws.

The cuts with the circular saw went pretty well. They were fairly straight. It was the jigsaw that was harder than expected. I underestimated the strength needed to move the jigsaw. I made three mistakes: one of the big curves isn’t as smooth as it should be, though it could be sanded down; the marquee cut didn’t follow the line correctly, though you can’t really tell; and I over cut a point where the jigsaw and circular saw cuts meet.

Overall, it was good for a first time. I’m going to make one more practice run and then on to the real thing. It’s going to snow the next few days, but this weekend looks nice...

Right Side Panel

Left Side Panel

Video Prep

I've spent this week watching some videos and preparing for today when I'm going to make a practice cut for the first time using the circular saw and jigsaw. The hardest part is figuring out the curve of the cut for the side panel. The Geek Pub FAQ says this is explained in the video for the mini bartop. I just watched that video - and it's not explained at all! Even worse, the 10 seconds where it is explained is not applicable to the full size cabinet at all, in my opinion. I showed Kelly and she said she'll help me, but I'll have to wait until her midterms are over this week. That's fair and I'll keep watching videos to learn some best practices. (Seriously, what did we ever do before YouTube?!)

Future Arcade Planning

Kelly and I talked about the arcade today. She told me something I had already thought to myself - that this probably won’t be the last arcade I build. I'm going to make mistakes and want to do it again. This came up in the context of doing the router work for the t-molding. She recommended I don’t do the t-molding on the first build as I’m going to make mistakes and will probably want to do it again.

She’s right. I’ve seen similar comments from people who have built their own arcade cabinets on Reddit. I have zero - ZERO - woodworking skills, so it will probably be an ugly mess to start. But I'm torn. I know that I can't let perfect be the enemy of good and if it is for practice, I should practice everything, including using a router. So I don't know.

I’m going to practice with some cuts this weekend and hopefully cut the sides next week when the weather gets warmer.

Pixelcade

I sold a bunch of my old Sonos equipment and decided to splurge on the arcade. I had been looking at GameOnGrafix for artwork for the side panels and the marquee for the arcade cabinet. I was undecided what I wanted to do as Kelly has a vinyl cutter, so it might be possible to make my own side panel art, but I was going to need a marquee.

And then I found the Pixelcade, which is an LED marquee. Available in five different sizes, I went with the P4, a 20" x 5" marquee made of 2 LED panels. It should work out of the box with LEDBlinky (on Windows) and RetroPie on the Raspberry Pi. (I'm still undecided what OS I'm going to run if I don't use the Raspberry Pi 3 B+.)

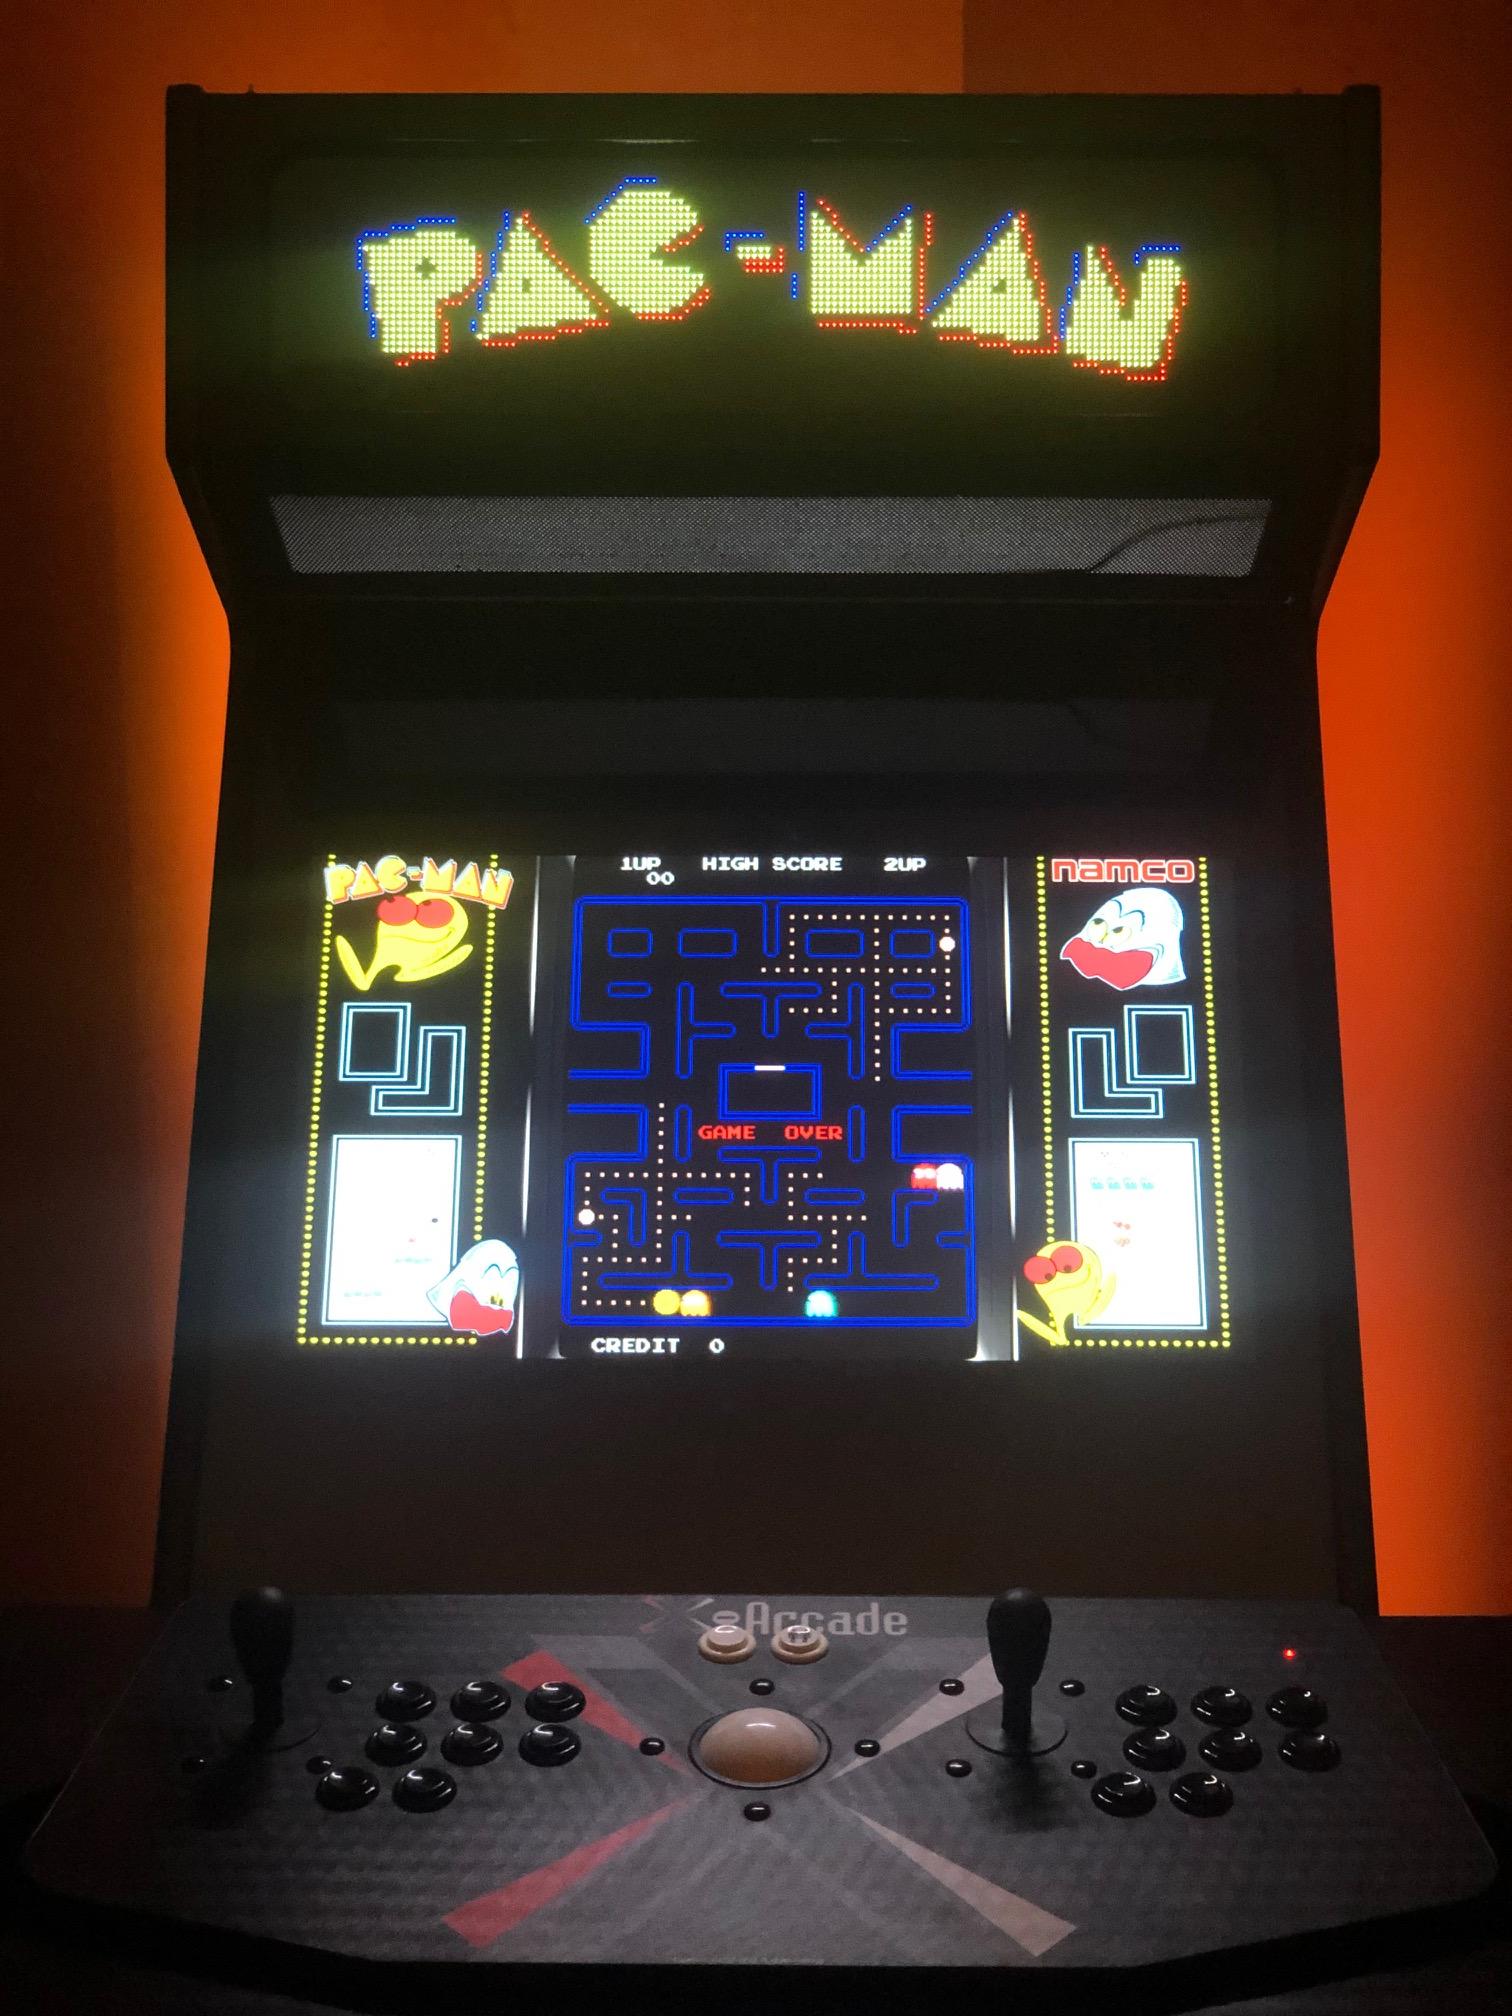
Depending on the game you're playing, the marquee will display the game art / title for that game. From their website, here's a cabinet when playing Pac-Man:

Pac-Man

Here's just a small sample of the game art Pixelcade supports from their homepage:

Pixelcade Art

Check out their homepage for videos of it in action and more artwork.

It's going to add some complexity to mount this in the cabinet as I have zero woodworking skills, but they have some nice mounting guides that should hopefully get me started.

The Pixelcade consists of the two LED panels, a power supply, and a logic board with a micro-SD card. It looks like there is really good documentation for installation of the hardware and software, including videos. And if I get really ambitious, there's even a REST API for more customization.

I still have a ton of work before I even get to the point of installing this, but if and when this cabinet is done, the Pixelcade is going to be a killer feature.

More Control Panel Prototype Failures

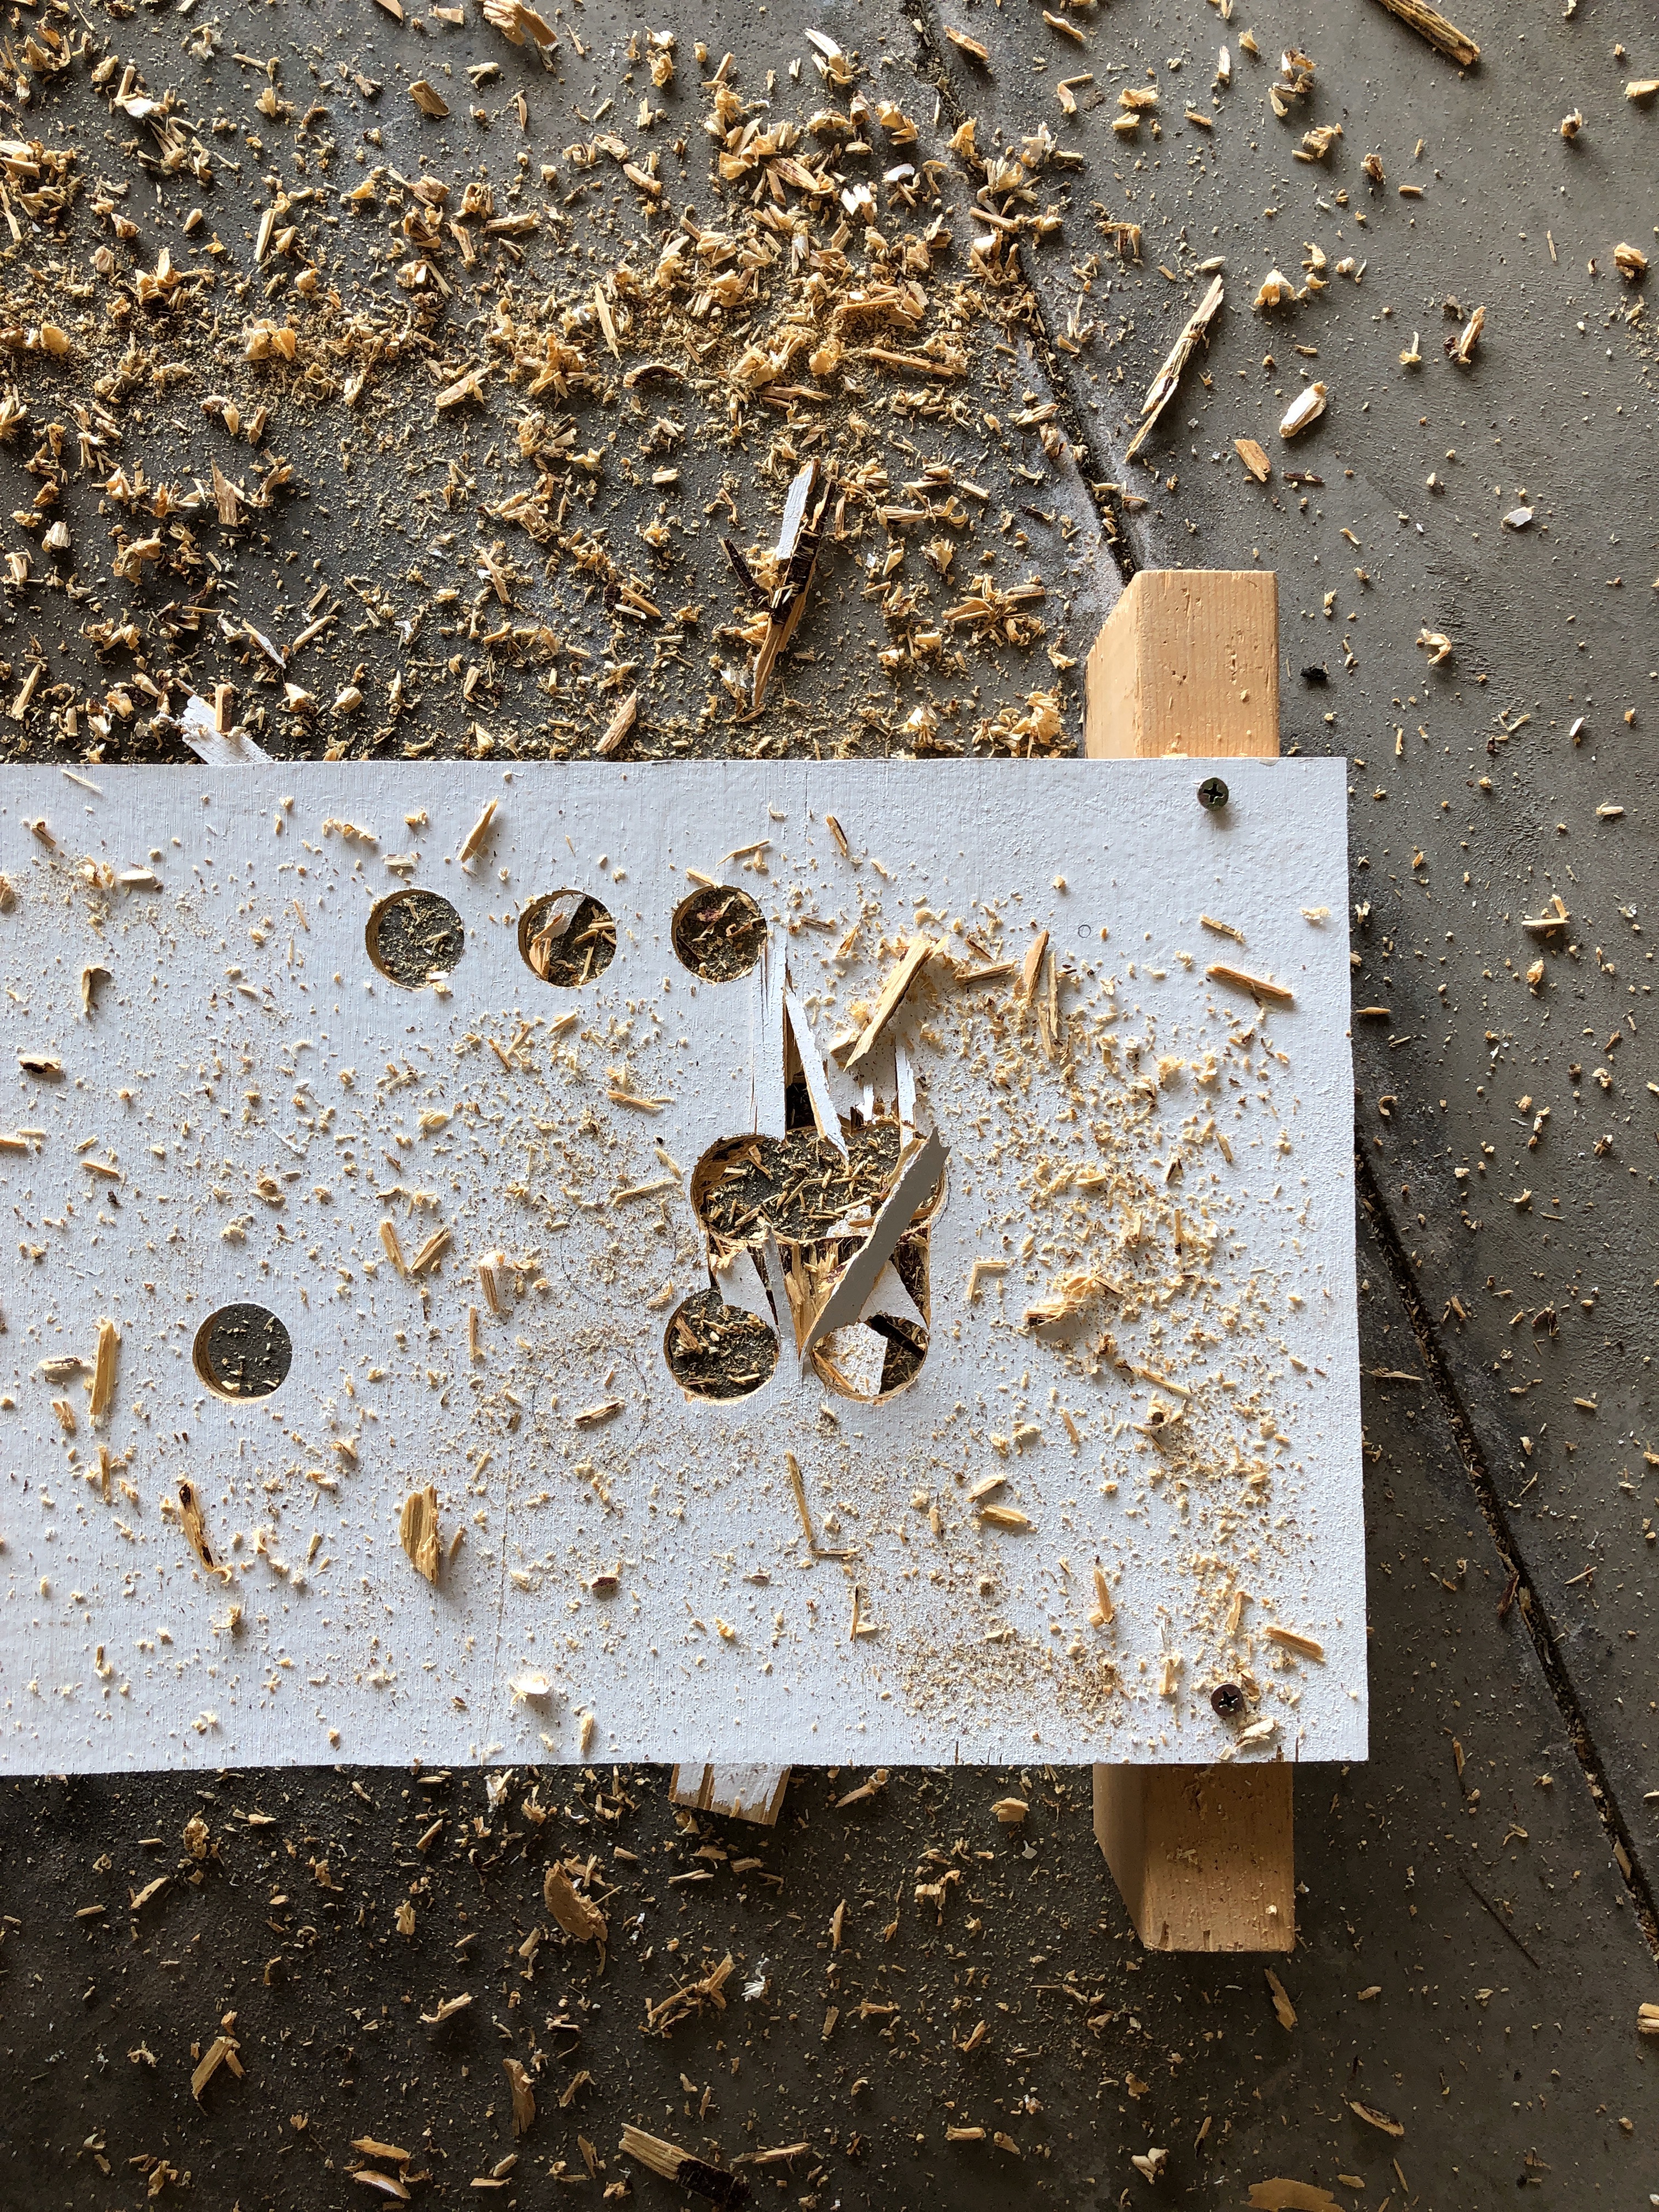
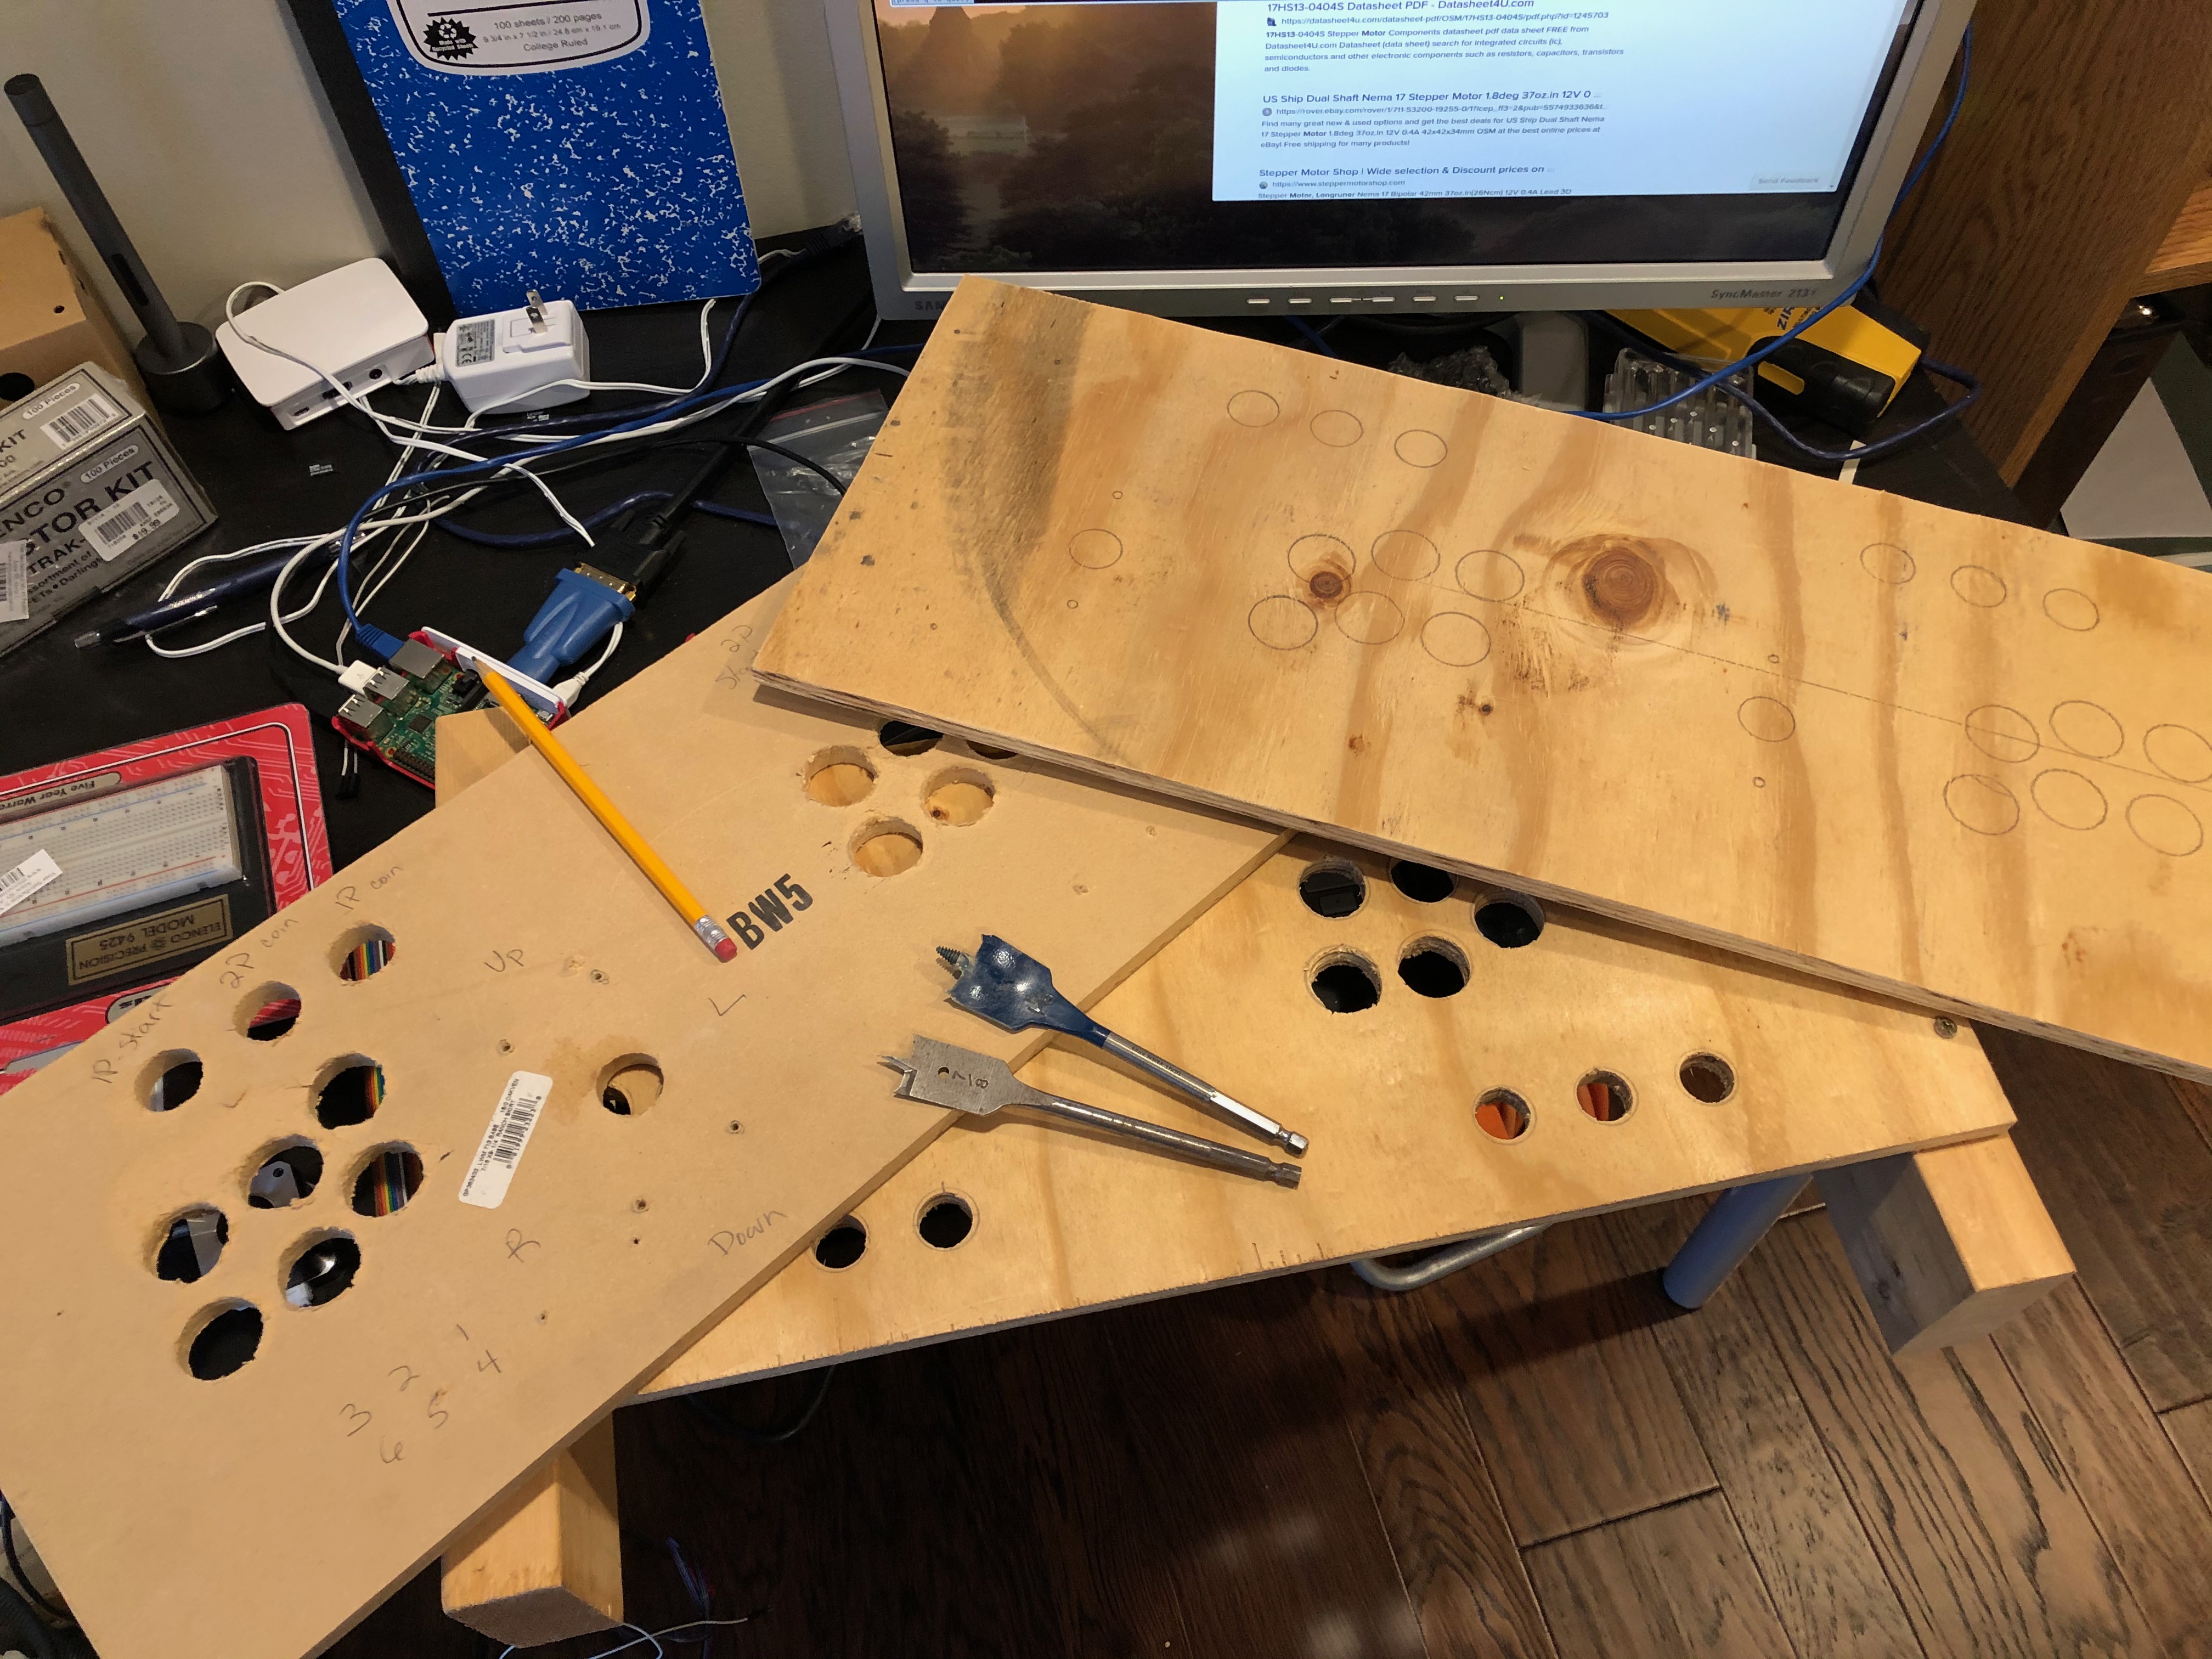
Kelly needed to replace the blade in the saw and she cut me a new piece of wood to use as a prototype for the control panel. (At some point, I'm going to need to learn to use the saws!) After carefully paying attention to using the right size drill bit, my board looks like this:

Prototype 4

Kelly then took a turn at doing it herself, and hers ended up the same way, so I don't feel too bad. It's the quality of the wood, it's just too cheap. The worst part is that the very first prototype that I built upside down was oak. I couldn't ask for better wood and I screwed that up.

I'm going to move on from a prototype and start focusing on building the cabinet out after a little more research and watching some more YouTube videos. (And hopefully it gets warmer soon so I can work outside!)

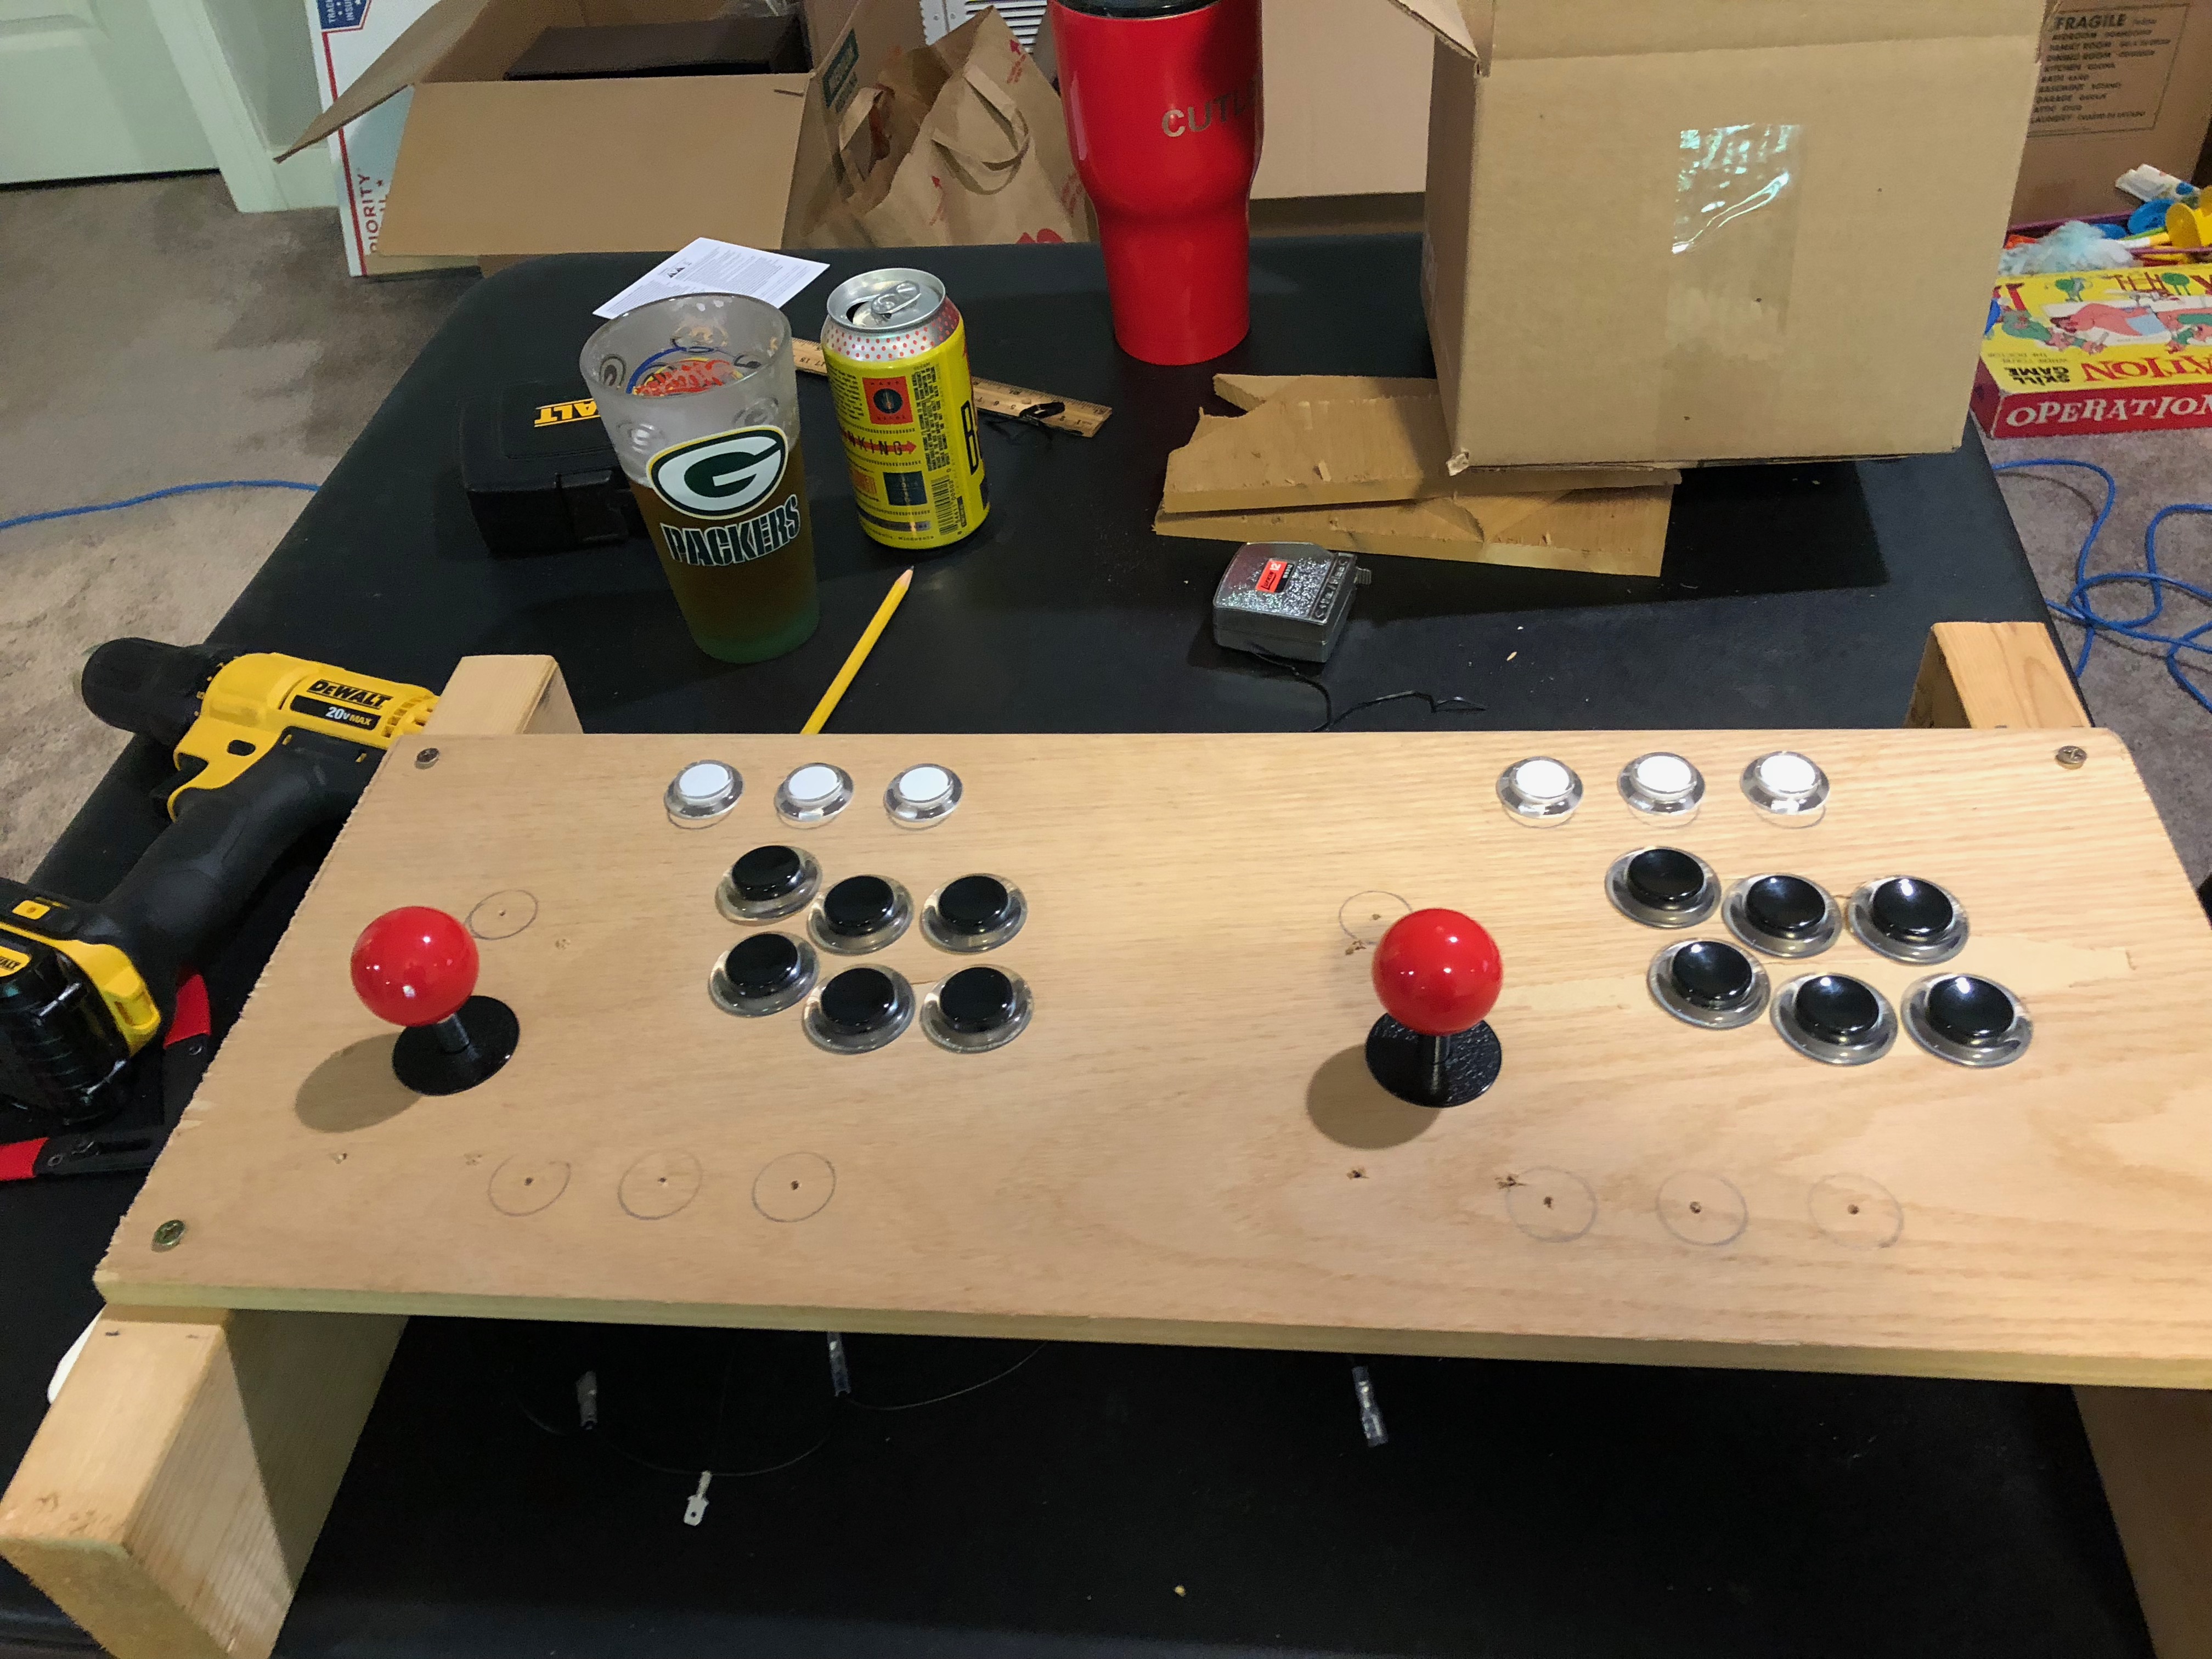
Control Panel Prototypes

If I don't improve my attention to detail, I'm going to waste a lot of time and money. Case in point: just trying to build a prototype for the control panel so I can figure out how to use the Ipac controller and arcade buttons.

The first prototype I built 18 months ago I built upside down. I tried to fix it, but it was just uncomfortable to use.

Prototype 1

The second control panel I drilled the holes the wrong size. I thought the normal size for an arcade button was a 1" hole - it is not, it is a 1 1/8" hole. So that board got tossed. Thankfully this is all old wood we had lying around that's fair game for stuff like this.

The third time was not the charm. Even though I took the arcade buttons with me to the garage where I was drillign the holes, after I cut the first couple and inserted the buttons to double check - and I got it right up until that point - I then went on to drill a number of holes too small again. I need to slow down and pay attention.

And for the record, I need 1" holes for the 1P / 2P smaller buttons and 1 1/8" holes for the normal arcade buttons.

Prototypes

Starting the Arcade Cabinet Again

After a year and a half break from working on the arcade cabinet, it's time to start again. I've started keeping a journal of my progress and I figured I might as well blog about it as well. I'll use this to keep track of my progress, what I've learned, and post some photos, too.

I've never done any woodworking - or really used power tools before - so I have a lot to learn.

Some random things I've done today:

  • Circular saw - added videos to a new "Woodworking" Youtube playlist I created
  • Subscribed to The Geek Pub - for $15 / year, I get access to all the plans they sell commercially as well as some additional videos. Plans also include the SketchUp files, an online CAD-like program.

    • 4 different arcade plans for sale (or included in their subscription)
    • I liked the 2 player standup - it seems easier that Koenigs in trying to change the size
  • Reviewed plans again from Koenigs

    • Metric only - conversion to Imperial doesn’t seem exact enough
    • Going to be difficult to build in Imperial
    • These were the plans I wanted to use for the longest time, but going to go with The Geek Pub
  • Watched 2 circular saw videos

  • The end of January may not be the best time for woodworking in the garage in Minnesota...
  • Watched Mavericks Arcade videos on Youtube - LEDBlinky (which is Windows only) has been updated. LEDBlinky looks really cool to control the LED lights in the buttons

  • Finally swapped the control panel prototypes

    • I drilled the holes in the new panel one size too small
    • Not sure if I have right 1 1/4” drill bit?
    • Kelly cut a new piece of wood for me
    • Will the third time be the charm in making the control panel prototype?

Azure DevOps Python SQLite Issue - Part 4

It turns out that all the problems I was having for about ten days in trying to learn Azure Pipelines for continuous integration that I briefly touched on in Part 2 had nothing to do with me. There was a bug in Azure’s hosted images of Ubuntu used in the CI pipeline that did not include SQLite, as Python lists it as an optional module.

It’s good to know I’m not crazy and I did set it up right and this answers the question of why my builds would work on Python 3.6 but not Python 3.7. Kudos to Microsoft for the detailed post-mortem outlining the problem, what they did to fix it, and what they’ll do in the future to avoid something like this happening again.

In other news, I was distracted for a week to help a co-worker out with my first hardware project. I wrote a few lines of code to turn on and off a small pump that is controlled by a Raspberry Pi. I even wrote a test for it!

Lastly, I almost have CodeCov.io integrated into my CI. I make a commit, Azure Pipelines builds it and runs the tests, and the coverage report generated from the build is uploaded to CodeCov.io.

Next I’ll finally start going through some of Talk Python training courses and use a TDD approach to write tests for what I’m learning.

Finishing Setup (with Dependabot and Pytest reporting) and Project Goals - Part 3

Using Dependabot to manage Python dependencies

All I want is to start coding. I want to learn how to write a Pyramid app the correct way and also to start learning pytest. There's just one more thing to do and one to tweak in Azure and then it's time for the fun part - the actual learning and coding.

First, I’m going to setup Dependabot to help manage my Python dependencies.

Last year I bought a Python bundle on Humble Bundle that included a one year subscription to Pyup.io. I’ve been using it for both NFLPool and MLBPool2 as it’s free for open source projects (both of those projects are licensed under a MIT license). I haven’t decided what license the content on SilverSaucer.com, but knowing me, it will probably be open source. But on the off chance it’s not, I’m going to try out Dependabot.

Github recently purchased Dependabot and made it free. Visit Dependabot, sign in with your Github profile and link which repositories you want Dependabot to help manage.

That’s it - Dependabot will keep an eye on your requirements.txt and send you Pull Requests when it finds a new version of a Python module for you to merge.

As I’ve integrated with Azure Pipelines for continuous integration, it builds the pull request and tells me if it failed or succeeded, which is nice to know before I merge it:
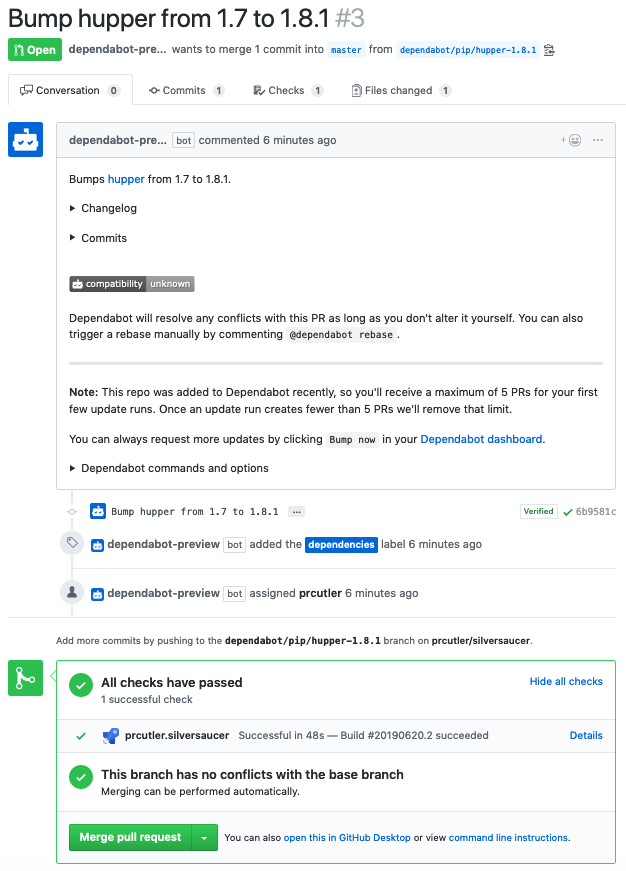
Dependabot Details

But of the five pull requests Dependabot created, three of the five failed to build in Azure Pipelines:
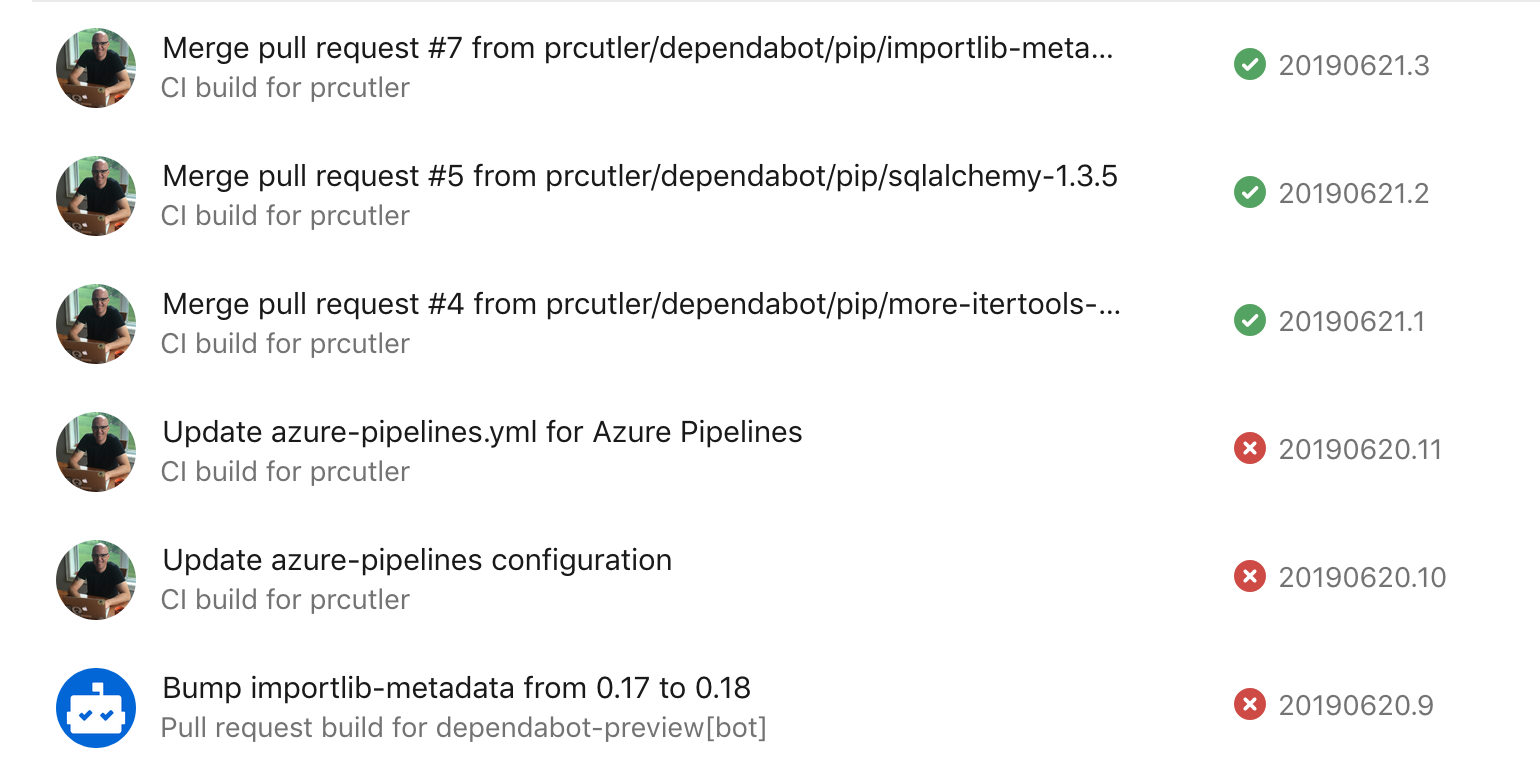
Dependabot failed builds

And it’s the exact same error as I ran into in part 2 - the builds in Python 3.6 work and they don’t in 3.7 due to some kind of (and I’m guessing) SQLAlchemy / pysqlite3 problem. (Log)

After even more troubleshooting, and if I had any hair (which I don’t, thankfully) I would have pulled it out. I finally gave up and just merged them all. It built locally and I figured future me could deal with it. And then all the builds worked again. I have no idea why. I don’t know how real developers do this stuff. But it’s working now, even with a couple smaller commits to update the README.

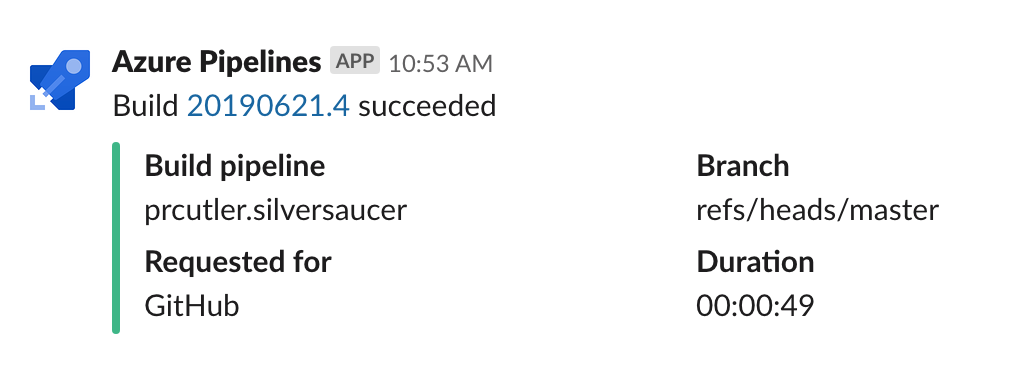
But when it does work, it feels great. I had updated the README, which kicked off a build, and since I hooked up Slack to Azure Pipelines, I saw this:
Azure working build

So now it’s setup just like the Test-Driven Development with Python says it should be. From Chapter 24:

“As our site grows, it takes longer and longer to run all of our functional tests. If this continues, the danger is that we’re going to stop bothering. Rather than let that happen, we can automate the running of functional tests by setting up a “Continuous Integration” or CI server. That way, in day-to-day development, we can just run the FT that we’re working on at that time, and rely on the CI server to run all the tests automatically and let us know if we’ve broken anything accidentally. The unit tests should stay fast enough that we can keep running them every few seconds.”

Excerpt From: Harry Percival. “Test-Driven Development with Python.” Apple Books.

Additional Tasks in Azure Pipelines

The Azure Pipeline docs are pretty great, including different things to configure based on the programming language you’re using.

For Python projects in Azure Pipelines, there are two tasks to add: 1. Publish Test Results 2. Publish Code Coverage

I have a feeling these will come in handy later.

I’ve only played around with the HTML report code coverage generates a couple of times. Looking at Azure DevOps, it looks kind of cool how they integrate testing into your dashboard.

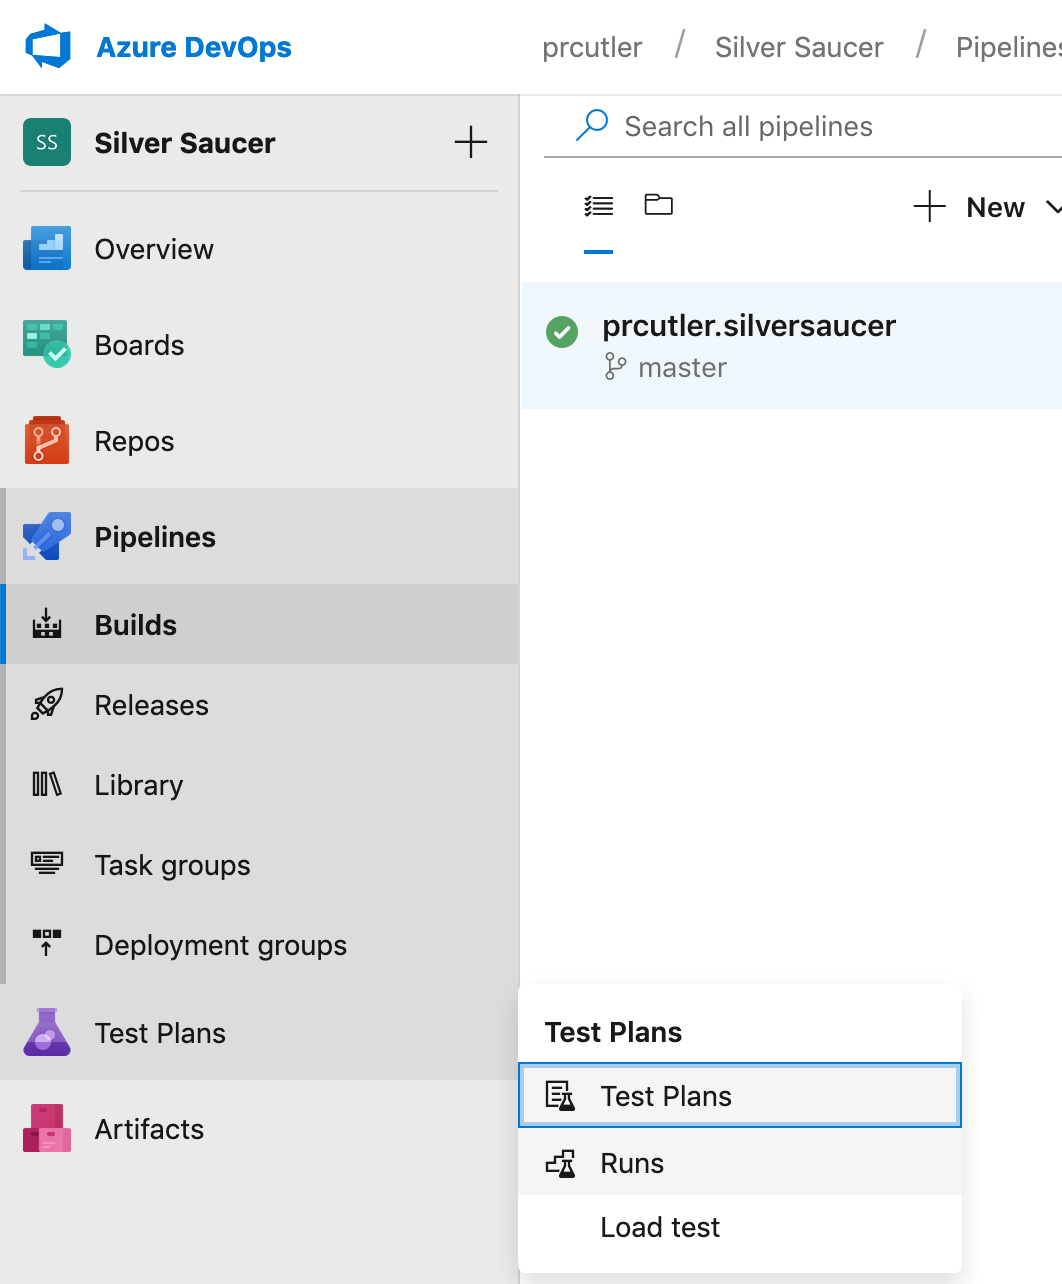
In your project’s dashboard on Azure DevOps, go to Test Plans -> Runs:
Azure Test Plans / Runs

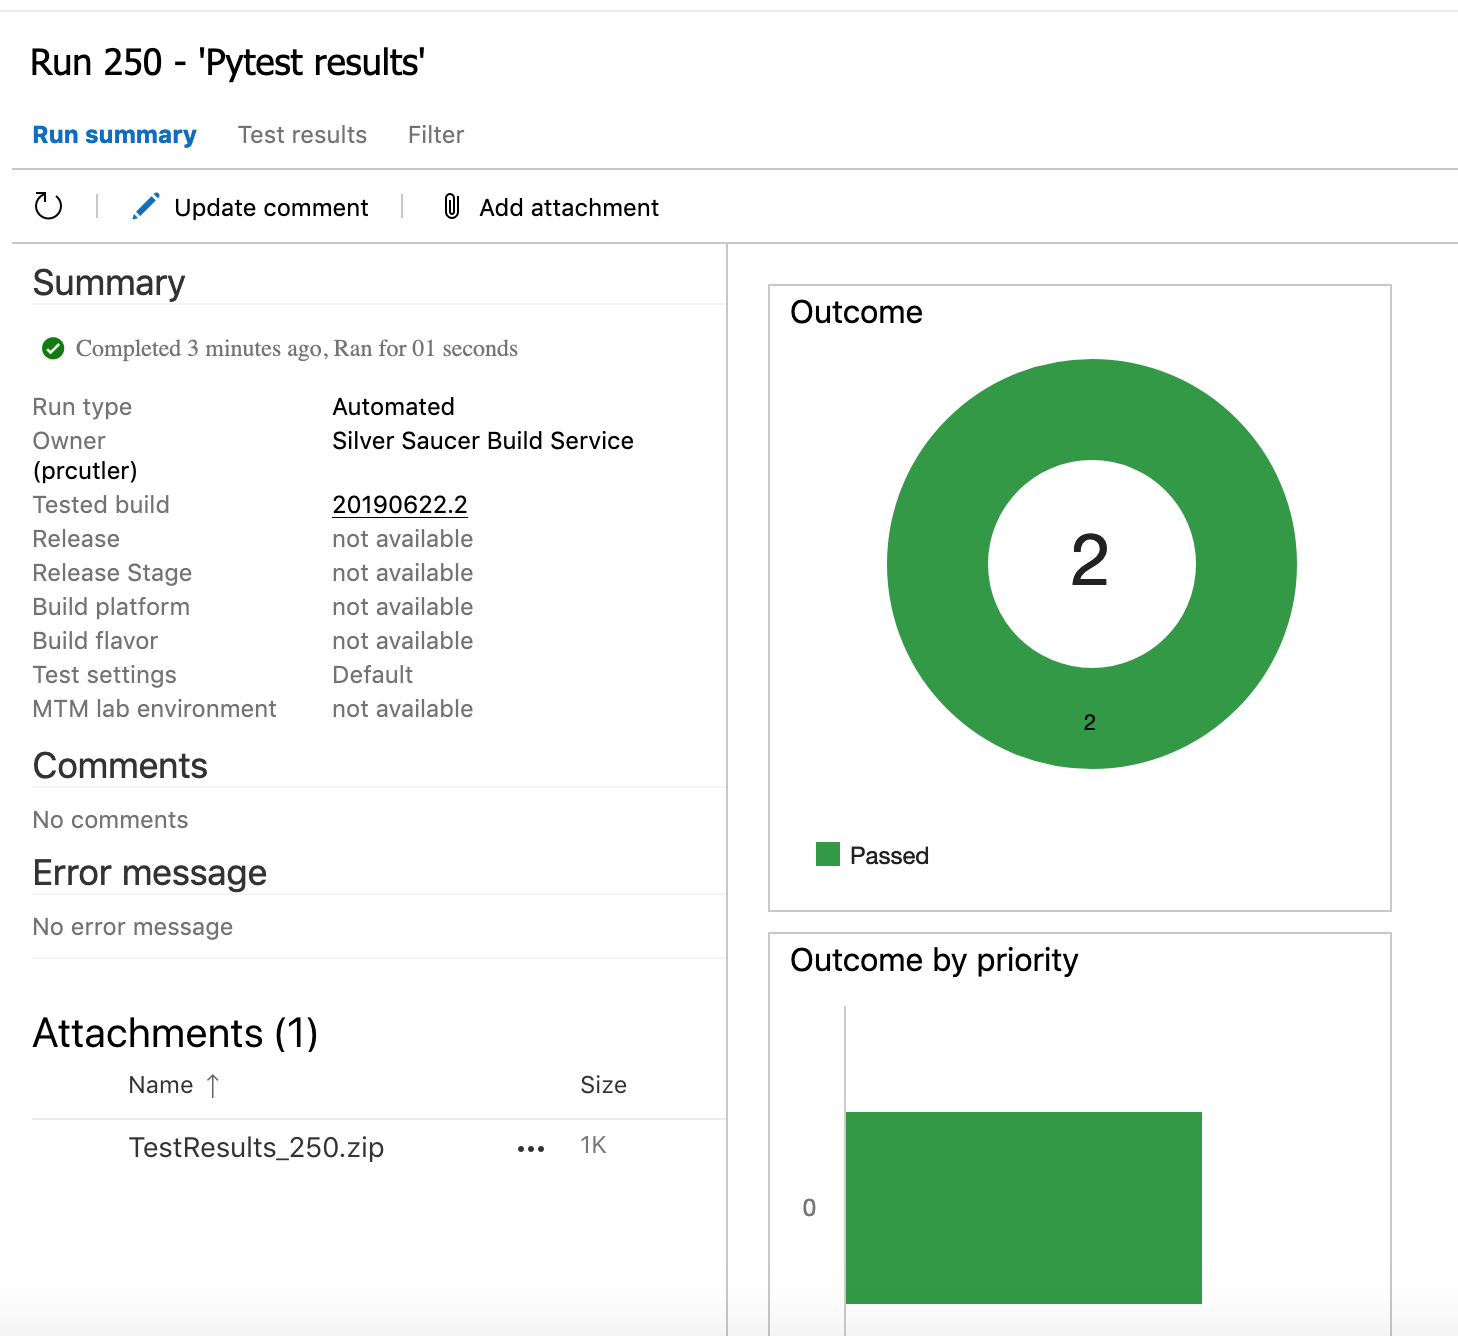
Choose which test results you want to look at it and there are pretty reports for you to view, and if you keep scrolling down on the right hand side it will give you different outcomes for review. It might save me a few clicks from the manual HTML code coverage builds, so I have that going for me.
Pytest Results

Project Goals

Now it’s finally time to start coding. I have two goals:

  1. Build a web app with the Pyramid web framework the correct way. My first two projects used a module called pyramid_handlers to manage views. This is an outdated way of writing code with Pyramid and I need to learn the modern way.
  2. Use Test Driven Development methodology to finally learn how to write tests using pytest. I’m going to write the test and then the code.

I’m not quite sure how I’m going to do this yet. I think it’s going to be a lot of jumping around a couple different Talk Python training courses. (If you have a rudimentary knowledge of Python, I highly recommend Talk Python’s training courses).

The course Building data-driven web apps with Pyramid and SQLAlchemy contains the knowledge on Pyramid and also includes a chapter on testing. The recently launched #100DaysOfWeb in Python has a bunch of chapters that will be useful in my quest, including Pyramid, Selenium, and Unit Testing Web Apps. That doesn’t even include things I want to eventually learn, like a Javascript introduction, CSS and more. (Yes, I saw the recent Jetbrains survey results and 40%+ of Python developers are using Flask for web development- but I’d like to get good at Pyramid before I switch to a different framework. And I really, really like the Pyramid community. The same could be said about my Python knowledge before diving into Javascript).

So while I’m going to kind of Frankenstein my courses, I’m going to do it using TDD. I’m not going to build a PyPI clone like Building data-driven web apps with Pyramid and SQLAlchemy teaches. Silversaucer.com is just an online playground for me to keep learning, and the first thing I’m going to build is a Randomizer for my vinyl record collection using the Discogs API. I’m going to work through the two courses above and I’ll also be using the following books to learn more about testing:

I’ll keep blogging what I learn and where I get stuck. I need to learn testing, especially if I want to continue maintaining and improving NFLPool and MLBPool2. And learning how to code is fun, in a frustrating kind of way (at times).
Setting up Azure Pipelines - Part 2

In Part 1, I covered the challenges I had in setting up my SSH key with Azure Pipelines to work with my existing Github repository, which contains a new Pyramid project without any customization (yet).

Now that Azure Pipelines could build my project, I spent the last week after that trying to figure out why builds would fail on Azure with Python 3.7, not with Python 3.6 or on my local development machine.

One question I was asked: Why continuous integration if I’m just a hobbyist? I have two answers:

  1. Test-Driven Development with Python by Harry Percival recommends it:

    “Rather than let that happen, we can automate the running of functional tests by setting up a “Continuous Integration” or CI server. That way, in day-to-day development, we can just run the FT that we’re working on at that time, and rely on the CI server to run all the tests automatically and let us know if we’ve broken anything accidentally. The unit tests should stay fast enough that we can keep running them every few seconds.”

    Excerpt From: Harry Percival. “Test-Driven Development with Python.” Apple Books.

  2. It’s cool. And that’s the real reason. Having the little “Azure Pipelines Succeeded” badge on the Github repo page; hooking up the Slack integration to get a message when a build builds or fails; and knowing I’m doing things like a “real” developer might.

But I digress. I set up Azure Pipelines to run two builds - one in Python 3.6 and one in Python 3.7. After I make a commit to the SilverSaucer Github repository, Azure Pipelines automatically starts a job and builds the project.

Azure Builds

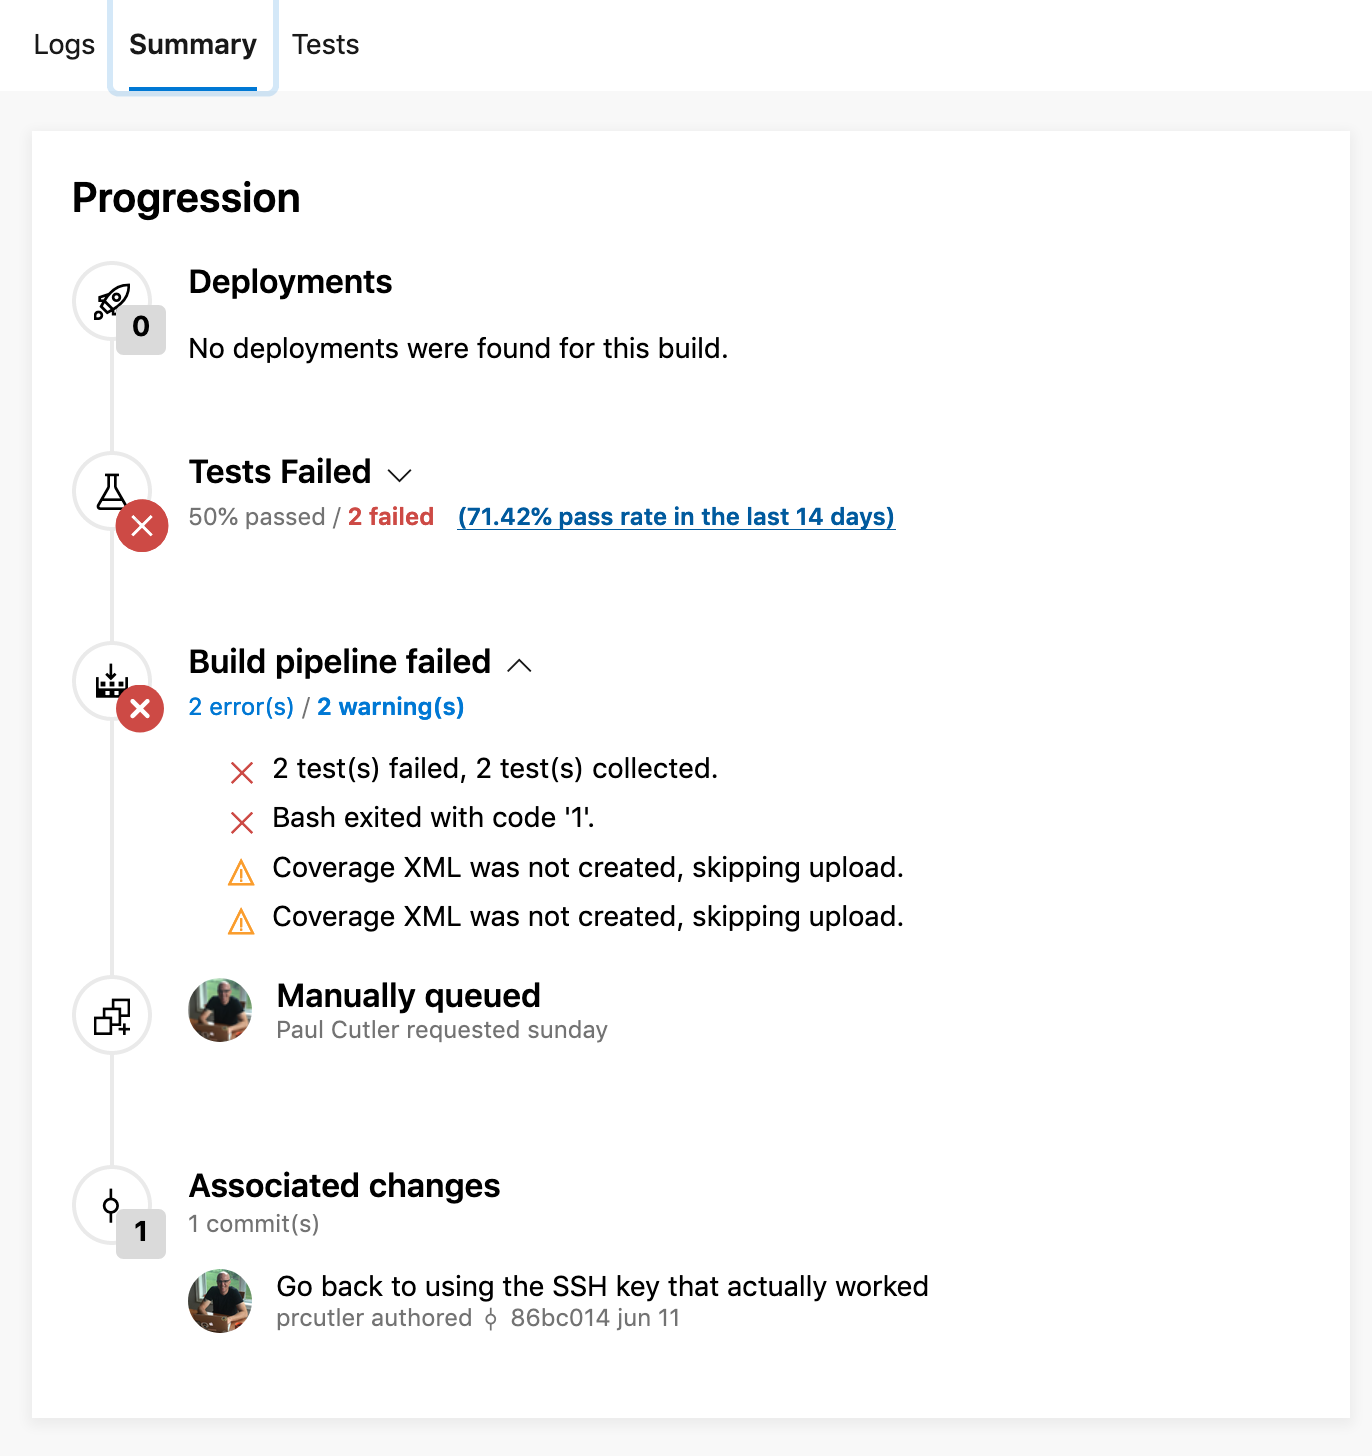
Two of the four tests passed.

The good news: The two tests using Python 3.6 pass and it builds!

The bad news: The exact same two tests fail on Python 3.7. (Log)

I made sure my development machine’s version of Python matched Azure’s and upgraded from Python 3.7.1 to 3.7.3 just to make sure - still failed.

I poked at it here and there for a few days and then asked for help in the Pyramid IRC channel. Right away, I received advice to add pysqlite3 and it worked! I used pip freeze to update my requirements.txt file and made sure pysqlite3 was in there, committed, and now I have a shiny badge on my repo.

I still don’t understand why it built on Python 3.6 but not Python 3.7. But it’s working and time to move on.

Coming in part 3: Hooking up Dependabot and the Python 3.7 builds fail again.